With daily life growing increasingly hectic, lots of people feel like they’re attempting to juggle too many things at once. So to stay organized and reduce stress, they use planners, jotting down their notes on a monthly, weekly, and/or daily basis.
Traditional paper planners have their advantages, but they also have their drawbacks. Digital planners are becoming more popular, and they provide a range of benefits over paper planners.
Which is great why you’re thinking about how to create a digital planner to sell! You’ll be helping out so many people get their lives more streamlined and organized. This article will show you how easy it is to make your own digital planner and sell it online.
Table of contents
What’s a digital planner?
First, let‘s get clear on what a digital planner precisely is. A digital planner has the look and feel of a paper planner but without the environmental guilt. You can keep your planner with you on your iPad, tablet, or even phone and take it with you wherever you go, just like you would a paper planner.
Digital planners come in numerous forms. Some have calendars, others don’t; some have totally blank pages, and others have creative graphics displayed all over them. Just like paper planners, there are digital planners to match all purposes and personalities.
As we all spend more and more of our time online, more savvy entrepreneurs are making a living by designing and selling their unique digital products. There are huge markets for these products, and digital planners are in hot demand for anyone who wants to earn a passive income.
The great thing about digital planners is that once you create the templates, the client can choose to keep and use them digitally or print them at home on regular paper for a more classic planner feel.
Why use a digital planner and not a paper one?
Who wouldn’t like to have all their appointments and meetings available at their fingertips in a safe, easy-to-use form? You could easily leave your paper planner lying around at home or at the office, or even in a café for anyone to pick up and snoop through!
But for sure, you’re not going to leave behind your tablet. And even if you did, you’ve probably set up a passcode to access it. Everyone needs their privacy and discretion, whether you’re interviewing for a job with a competing company or scheduling a consultation with your doctor/ Nobody else needs to know your business but you! Digital planners will give you that privacy.
Now that you know what a digital planner is and why they’re so popular these days, let’s take a look at what kind of digital planners you could potentially make.
Types of digital planners
With the many different types of planners out there, you can easily pick and choose which types of planners suit your way of life best and which types you can offer to your customers.
Digital planners are pretty versatile. But in general, here are the main types of planners that can be made digitally:
- Dated planners: These planners start at the beginning of the year, and every page is dated for that specific year.
- Undated planners: These planners have no date attached to every page. You can fill it in yourself. You get more flexibility and you can start anytime.
As a pro tip, if you intend to sell digital planners, going with an undated planner would be a great option since more and more people want flexibility, and they want something they can reuse the following year.
Both of these types can be expanded to many other types of planners:
- Blank planners
- Work planners
- Bullet journals
- Personal planners
- Financial planners
- Health and fitness planners
How to start a digital planner business in 4 easy steps
The digital planner business is a fantastic way to start making money online! You get to be creative while also earning a passive income as well as potentially turning it into a full-time business.
Here are four easy steps to take if you want to start a digital planner business…
Step 1: Pick a niche
When you decide to start an online business, one of the first steps you’ll need to take is to choose a niche. Having a focused niche allows you to more easily grow your audience, connect with sponsors and advertisers, and concentrate your marketing and content creation efforts.
There are thousands and thousands of niches out there. You’ll want to find one specific market that you can serve, over and over again, rather than spreading yourself too thin by trying to operate in multiple niche markets.
Not all the niches out there make for a profitable online business. And not all will appeal to you. The most successful online businesses combine the interests of entrepreneurs with a popular and searchable topic that people are willing to spend money on to learn about or add to their lives.
So when it comes to planners, here are the top 10 types of planners you can create that target specific profitable niches:
Undated planners: These usually come in the form of a monthly and weekly planner. Because you’re filling in the dates on these planners yourself, you can start them whenever it’s most convenient for you, not just when the calendar says it’s time. These planners are perfect for any niche.
Business planners: Entrepreneurs can use them to help them schedule their time; however, more and more business owners are turning to traditional paper planners specifically designed for people running their own brand. Business planners vary greatly, but most boast the following features: sections for laying out and tracking goals, large notetaking sections, and habit tracking pages. These types of planners are not only for business owners and CEOs; managers, assistants, and team leaders can benefit from them, too.
Coaching planners: These planners can be tailored for any type of coaching niche, and they’re helpful to keep track of appointments and make notes for each client. They also typically include “must-do” sections, “to do” sections, tasks with timestamps, and main goals.
Fitness planners: Since most people are either trying to lose weight, gain muscle, or have a balanced healthy life overall, a fitness planner can be profitable. You can create short-term, goal-setting journals, or year-long fitness planners that’ll help people keep track of their body measurements, food and water intake, hours of sleep, and even their mental health. The fitness niche is a forever-growing one.
Meal planners: These types of planners go hand in hand with fitness planners but can also be sold or distributed separately for people interested only in their diet. You can create planners for specific types of eating (vegan, vegetarian, paleo, keto, etc.) or even for people who have a big family and want to plan and meal-prep a week’s worth of food.
Wellness planners: These planners usually focus on mental and physical health, self-care, building new and healthy habits, changing old thinking patterns and negative emotions. There will always be people who want to improve themselves, so creating wellness planners can be a very lucrative venture.
Baby planners: A pregnancy journal or planner is a great way to help keep you focused on your pregnancy. You can create planners to track information from appointments, weight changes, medications, and test results. You can also create a small area for journaling to write thoughts and feelings down. Pregnancy can be scary for most women, but having a planner to organize everything is very useful.
Content planners: Since the rise of social media, there’s been more and more content creators and managers that might feel overwhelmed by all these platforms. You can create a complete content planner that can act as a virtual assistant.
Budget planners: Many people want to know exactly where their money is being spent, and how much they’ve got coming in. Knowing where every dime is being spent is a great first step to starting your savings, getting out of debt, or preparing for retirement. A planner will help them organize their finances much easier.
Step 2: Create a draft
Once you’ve figured out the general type and specific niche of planner you want to create, get started in designing your very own digital planner. Here’s how…
- Outline the pages – What do you want to include? Would you like there to be calendars or no calendars? Would you like just blank pages? What color would you like them to be? In what order will they appear?
- Do some research – After you’ve put down some ideas about your own digital planner, to get you one step further, look for inspiration by researching your competitor’s products. Pay attention to what you don’t see. What could you do that would be an improvement on their design?
- Sketch the pages – This is the fun part for creative and visual types. Draw it by hand or with a digital sketch program to start to craft the look and feel of your digital planner.
Step 3: Chose a tool to design and create the planner
Now is the time to actually start making your digital planner idea. In order to do that, you’re going to need to choose which program you want to use to create your digital planner masterpiece.
We can make some suggestions for you, but please note that if you choose another program, it’s critical that your design program allows you to create hyperlinks.
Using hyperlinks will save you a lot of time, and being without them almost defeats the purpose of having a digital planner! When you have hyperlinks, you can just click on them to take you to your destination instead of scrolling through a bunch of pages first.
- Keynote App – a free app by Apple, compatible with all Apple devices.
- Microsoft PowerPoint – a program that usually comes with desktop Microsoft Office packages, but now you can get a version that works on tablets and cell phones, too.
- Google Slides – a free program by Google, compatible with all devices.
- Adobe InDesign – the Cadillac of design apps; this one comes at around $20/month, but you can also use their 30-day free trial to see if it’s worth the price tag.
- Canva – a graphic design application that tries to make it simple to create visual materials without requiring substantial graphic design knowledge.
To make a simple guide that can work for everyone no matter the operating system or device, we’ll show you how to create planners using Google Slides and Canva.
Google Slides is versatile, and you can access the files from every device as long as you have a Google account. The bonus is that it’s free, so if you just started out and you don’t want to or can’t invest in professional software, this is the best free version you can get. The same goes with Canva.
How to create a planner template with Canva
Canva is a fantastic online graphic design tool even for people who aren’t experienced in graphic design. Because of its easy-to-use and simple interface, anyone can use it. It can do everything from basic photo editing to producing social media photos, brochures, and documents.
It has many features and is reasonably priced at a little more than $10 a month. An extensive free plan is also available, including a pro version free trial for 30 days.
To create a planner, simply log into Canva and click on Create a design.
From there, on the right side, you have plenty of options to play around with. You can start by searching for a planner template that you can edit to your liking or create one from scratch.

You have plenty of elements, shapes, clip art and more to play around with and design an original planner that you can sell later on.
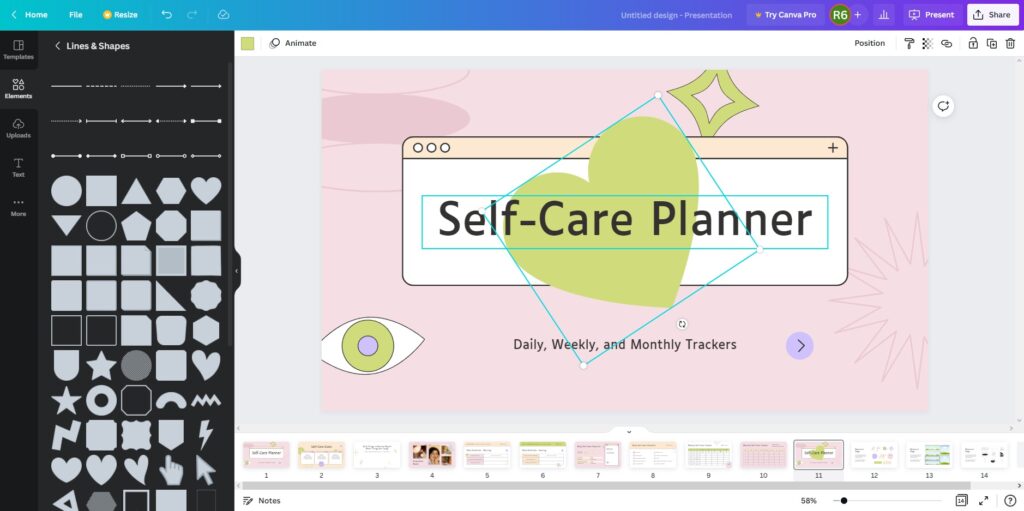
The first thing to create is a cover. You can give it a title, or you can leave it blank for people who want to fill it in themselves.

Next, create a blank page with tabs on the right side. Those tabs will have links to other areas of the planner.
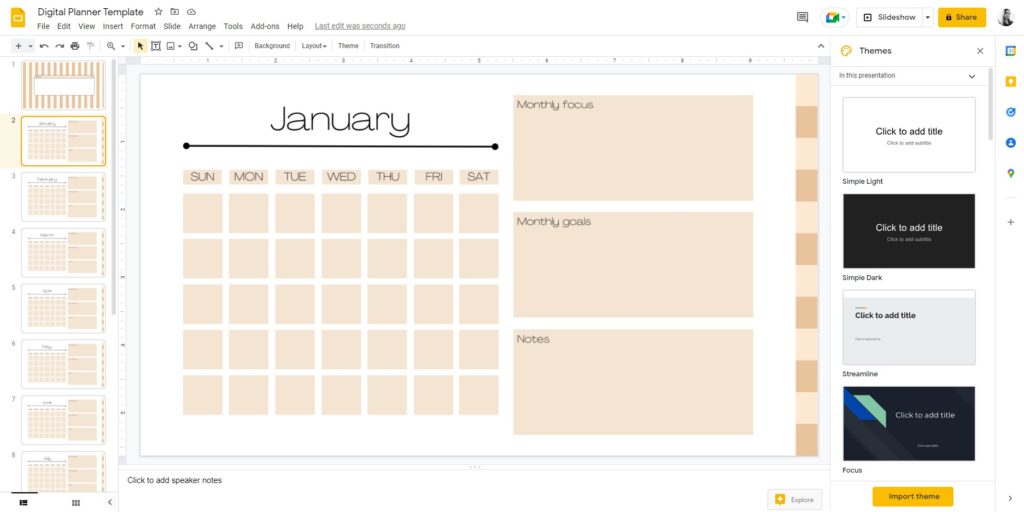
After that, you can create pages for each month with separate sections for to-do lists or other types of notes. Take this first page as an example:

You’ll proceed to make 11 more for the rest of the month. Canva allows you to duplicate the slide so you don’t have to build it again from scratch. Just change the name of the month once you duplicate.
Once you’re happy with the design, click on the Share button in the top right corner, then the Download button.

For now, we’ll just save them as a PNG for the purpose of using them as backgrounds in Google Slides.

How to build the planner with links with Google Slides
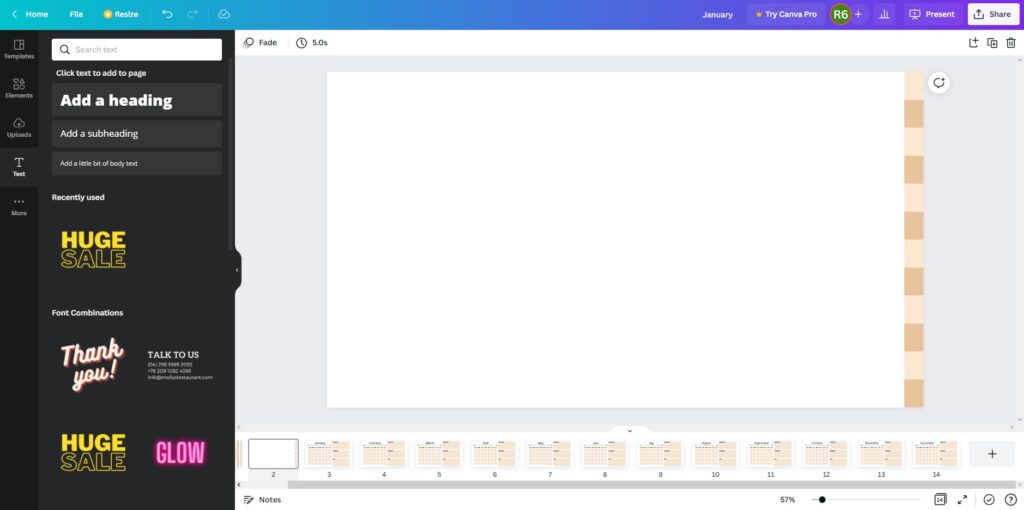
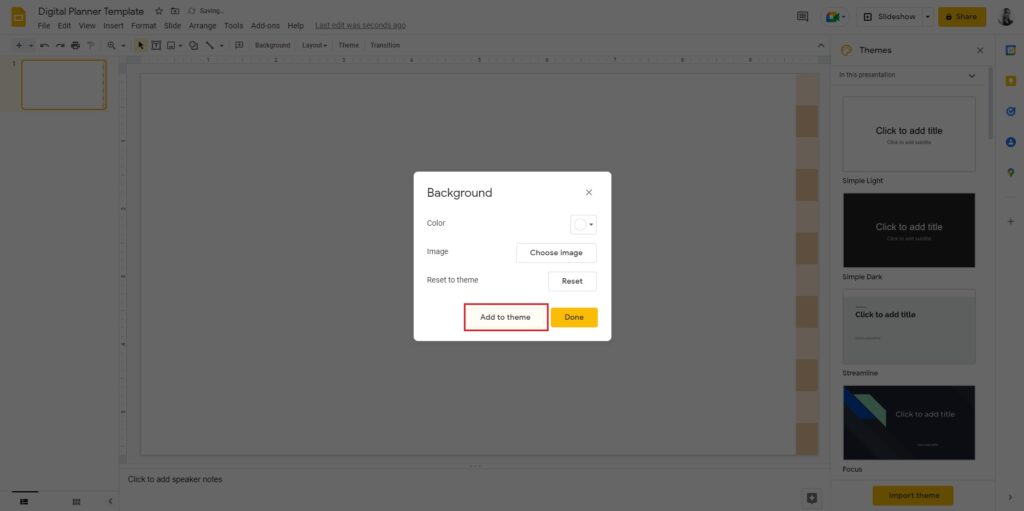
Once the PNG files are finished downloading, you can head over to Google Slides and create a new presentation.
The first thing to do is right-click on the slide on the right and change the background. From there, pick the Choose image button and you can upload the blank slide of the planner with the tabs. After that, click Add to theme.
Once you’ve done that, you can create new slides and simply drag and drop each exported PNG from Canva in the right order.
Here comes the important part where we link our pages to the side tab for easier access. First, we need to add a text box inside each tab like this:
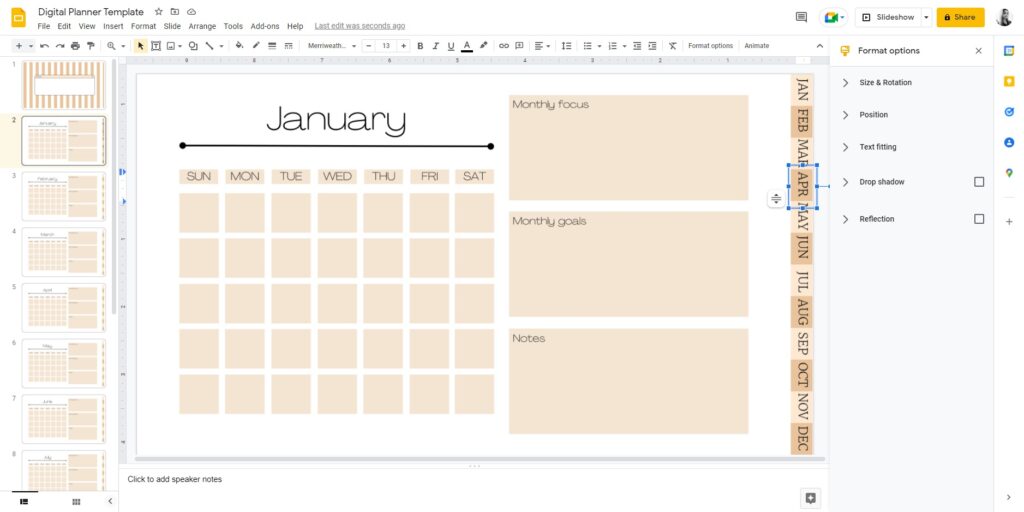
To make the link, click on the text box (not the text inside), then click on the link icon on the top toolbar. In this example, the January tab will link to slide 2, which is the January calendar slide. Do the same for each tab with its respective month.

If you want to check how it works, click the Slideshow button. Now that you know the links work, you can copy the text boxes and paste them onto all the other remaining slides.
Once you’re happy with everything, it’s time to export it. Go to File > Download > PDFDocument.

How to edit the digital planner
Once you have the PDF, you’ll need apps that are compatible with it and can freely edit them. Here are three great options you can choose from…
- iOS users: Good Notes app
- Android users: Evernote app
- For both users: Note Shelf app
Once you put your planner up for download, your customers can freely edit the planners using one of these apps. There are also plenty of other alternatives which they can pick from. They’ll be fine as long as they pick the ones that support PDF importing.
As a bonus, if you want people to decorate their digital planners, you might want to create:
- Digital planner stickers
- Clipart
- Digital washi tape
- Digital sticky notes
When creating any of the above, make sure you save the file format in PNG. PNG means there’ll be a transparent background behind the sticker, making it easy to layer and use with a digital planner that might have a black background so that the stickers take up less room.
You can even offer sets of these stickers or clipart as a bonus for the people who purchase your planners.
Step 4: Set up a store
Now that you’ve created your digital planner, it’s time to sell them! In order to reach people, you’ll need to find a platform to host and sell your creation.
Here are the main platforms people use to sell their planners on:
Note that some platforms require some sort of listing fee, joining fee, and transaction fee for a cut of your profit.
Alternatively, if you want to make the most out of your profit, we suggest you build your own website. You can control who can access your files, and you can set your own rates. Not only that, but you get to keep 100% of your profit.
You can achieve that using Download Monitor and all its useful features. Click the button below to see all the plans and what features they include.

Download Monitor
Grow your audience, track download performance, and convert your traffic into email subscribers with an easy-to-use digital downloads solution for WordPress.
Conclusion
As you can see, it’s not that difficult trying to create a digital planner to sell. It requires just a bit of time, planning, and effort. There are many different types of templates you can use to create your own digital planners. With all the different themes, designs, and features for your customers to choose from, profit is secured.