
A robust security strategy shouldn’t only look at malicious actions. You’ll also want to consider what your site makes public, such as your file structures. With access to your site’s directories on the front end, you risk your site’s security and user safety. The good news is that there is a way to disable directory listing within WordPress fast.
The general approach for anything using WordPress is to use a plugin. However, you can disable directory listing in no time using Secure Transfer File Protocol (SFTP) and a text editor. You won’t need much knowledge, and you can achieve the task in a few minutes.
For this tutorial, we’re going to show you how to disable directory listing within WordPress. First though, we’re going to explain what directory listing is, and what it means to disable it.
Table of contents
What Directory Listing Is
Your website uses typical organization for its files – everything sits in folders that you can branch into. We call this a ‘directory tree’ in some cases. However, whether you can see this or not depends on if you use an index.php or index.html file for your site. If this file exists, the directory won’t display.
This would be perfect, but if the directory doesn’t include an index file, you might be able to list the contents on the front end. We’d bet that all the subfolders for your WordPress installation do not have an index file.
We’ll show you later how to check whether you can list the directories for your site. In the meantime, know that if you can, others will be able to do this too. As such, disabling directory listings within WordPress is a good way to stop others from viewing these files.
Why You’d Want to Disable Directory Listing Within WordPress
It’s a good idea to only give users the access they need. For most visitors, they should only get to see your site’s posts and pages. Anything under the hood is something you want to hide. There are many more reasons why you’d want to disable directory listing within WordPress:
- You get to ensure that malicious users won’t be able to access any exploitable vulnerabilities relating to your site. In lots of cases, you won’t know this is an issue until it’s too late.
- Access to your files through directory listing can ‘give away’ elements of your site you’d like to keep locked up. For example, if you use plugins to intake newsletter signups, the public will be able to access it.
- There’s another issue relating to plagiarism and theft. For example, a user will be able to scan over your files for media assets – unrestricted and free to everyone who wants them. This can again be an issue if you offer locked content. All of it could be available within the directory listing.
As such, you’ll want to disable directory listing within WordPress as soon as you can. First though, you’ll want to find out whether you need to do this for your site.
How to Check Whether You Can Browse Directories for a Site
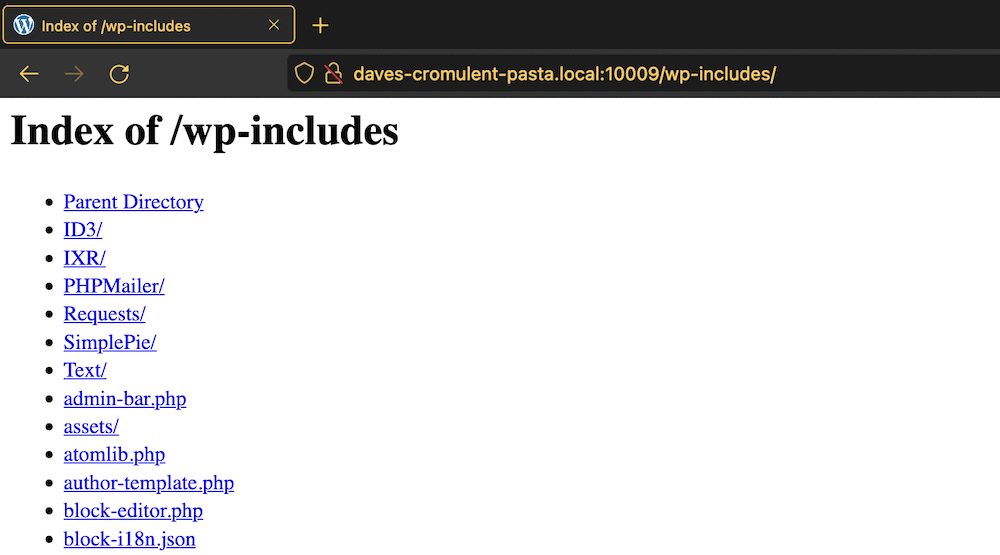
There’s a super simple way to find out whether you need to disable directory listing in WordPress. You’ll want to visit the location of your site’s wp-includes folder. You can do this at the following URL, and replace our placeholder with your own site:
https://example.com/wp-includes/
You’re able to do this with https://example.com/wp-content/uploads/, or any other subdirectory within WordPress. None of them will have an index file, so if directory listing is enabled on your site, you’ll be able to see the contents. The goal is to see no access to this:

If you do need to disable directory listing within WordPress, there are two fast ways to do it. Over the rest of the article, we’ll look at both of them.
How to Disable Directory Listing in WordPress (2 Ways)
The following two sections will show you how to disable directory listing. We’re going to start with the toughest to achieve. However, in reality, neither of the options will tax you. In fact, the ‘manual’ option might offer you the most straightforward route.
1. Make Changes to Your Site’s .htaccess File
If you run your site on an Apache server, you will have a direct way to disable directory listing in WordPress. You can alter your .htaccess file, which will give your server the commands it needs to hide your listing.
However, before you begin this, you’ll want to bear a few things in mind – and have some tools to hand. Let’s run down the list.
What You’ll Need to Alter Your .htaccess File
There are a few skills and tools you’ll want to have in place before you tackle this. Here’s a handy list to help check off each item:
- You’ll want to understand the structure and organization of your WordPress files and folders.
- If you don’t have knowledge of SFTP, this is also something you’ll need.
- To access your server, you’ll want to have a good SFTP client, such as Cyberduck, Transmit, or FileZilla.
- Speaking of which, it’s important to have administrative access to your site’s files. In some cases, this might mean you need to be able to access the whole server. Other times, it could be a specific folder.
- You’ll want to have all of the credentials you need to access your site and server. This includes SFTP logins.
- While it’s not necessary, a good text editor will help you edit your .htaccess file and save your changes. However, you can do this using a standard text editor such as Notepad or TextEdit.
Once you have all of these in place, you can begin to disable directory listing within WordPress.

How to Edit Your .htaccess File
Your first task is to log into your server through your SFTP client. This will involve four different pieces of information:
- The site you want to log into.
- A port number – under normal circumstances, this will always be port 22.
- Your SFTP username.
- Your SFTP password.
In lots of cases, you can find these within your hosting control panel. Once you succeed, you’ll see a directory tree. Your exact location within this will depend on your server’s set up, and your hosting provider.
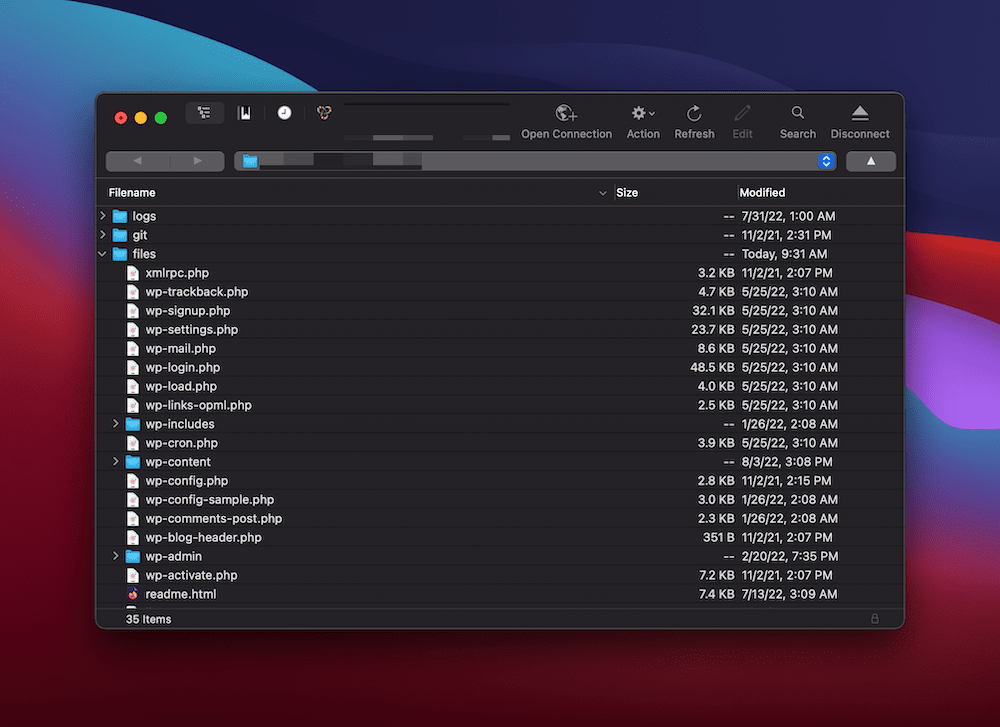
Regardless, you want to find your site’s directory. This might be in the top level, or you may need to look for a folder with your site’s name. The latter will be more common if you host multiple websites on one server. You may also see a few other names, such as public_html, www, public, or app.
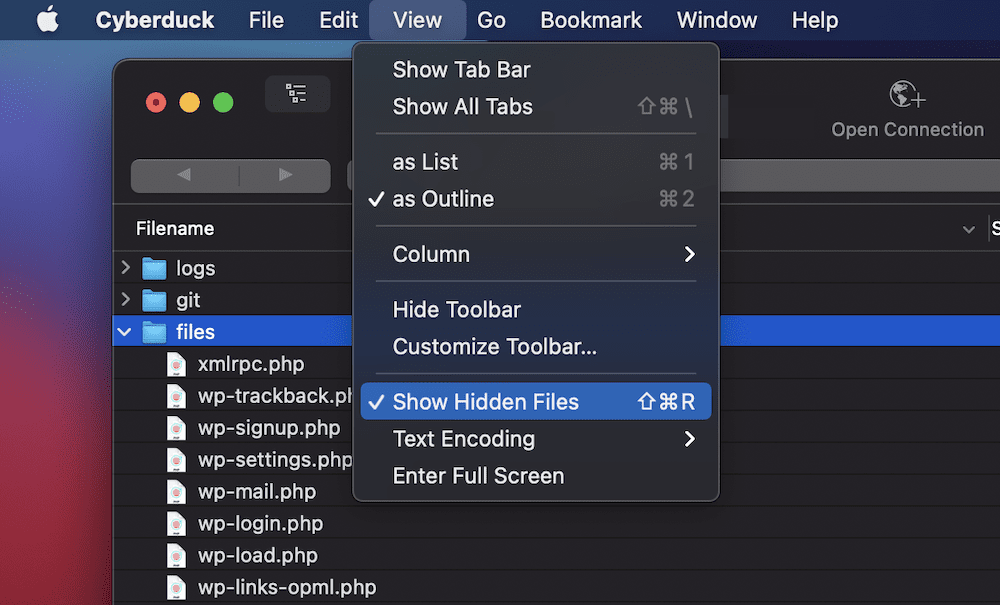
Inside this folder, you’ll spot your .htaccess file. If not, you either don’t have one, or will need to show hidden files on your server. If you don’t have one, you can create it once you open a text editor.
Speaking of which, you should open up your .htaccess file now (or your text editor). This will display a few lines of text. It is a set of configurations for various server-related tasks such as rewrite rules. However, you won’t need to deal with any of these entries.
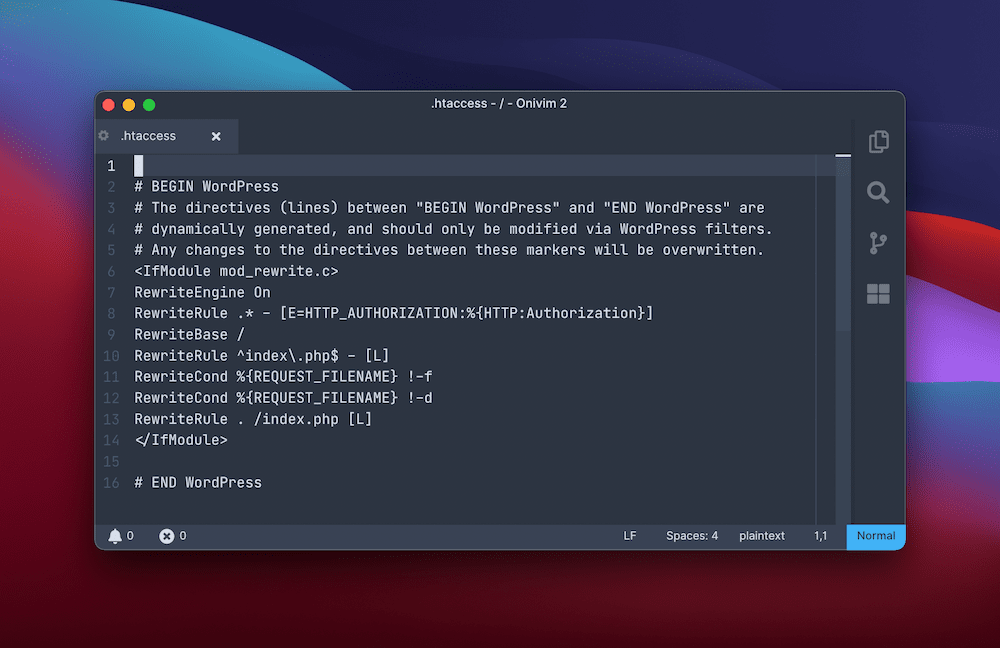
Instead, you can add the following line to the bottom of the file:
Options -Indexes
Once you do this, save your changes. Next, check the front end of your site using one of the two URLs from the previous section. If the change is good, you’ll find that you can’t access directories for your WordPress site any longer.
Changing Directory Listings for Nginx Servers
Nginx servers are popular, and are almost the default option for most modern web hosts. As such, the instructions for .htaccess files won’t work, because Nginx servers use different configuration files.
However, while altering an Nginx configuration is straightforward in principle, the reality is different. Nginx servers don’t allow for as much user customization as Apache set ups. What’s more, the default setting to disable directory listing in WordPress for Nginx is “off.”
To sum up, you may not need to worry about this security hardening on Nginx servers. However, if you do need to disable directory listing, you should contact your host to make the change.
2. Use a Plugin to Disable Directory Listing Within WordPress
Given that WordPress enhances functionality through plugins, you’d expect there to be a few options available. However, this isn’t the case – at least, not for free. For example, Sucuri Security offers this functionality, but only for premium users of its Web Application Firewall (WAF.)
It’s the same situation with another popular security plugin – iThemes Security. The premium version lets you disable directory listing in WordPress through a quick button press, but this isn’t available in a free version.
On the whole, you’d have a faster and more flexible time using SFTP to disable directory listing within WordPress. However, if you do use a security plugin, you’ll want to check whether it has the feature in the box. This way, you’ll save yourself some time before you get to work.
How Download Monitor Can Help You to Protect Your Site’s Files Further
If you want to protect your site, you’ll often use a security plugin. If you want to protect your downloads, you’ll want to disable directory listing in WordPress. However, this isn’t the full picture. There’s lots more you can do to keep visitors’ hands off of your files. Download Monitor can help with this, and more.

It’s a full-featured way to build a document management system for your site. At its core, you can upload files and manage them from your WordPress dashboard. However, there’s lots more the plugin can do:
- You can offer multiple versions of a file. This is great for preserving the history of a file and giving users the chance to download older versions.
- You’re able to define mirror links to a file, in case you expect downtime. As an alternative, you can create a Content Delivery Network (CDN) of mirror links to improve performance.
- WordPress lets you handle taxonomies of your downloads in the same ways as posts – through categories and tags. You can also add other metadata to your files.
The best experience of Download Monitor is with a premium subscription. It starts from $39 per year, and gives you access to a number of extensions to enhance the core functionality. For instance, you can lock downloads behind social media shares, email, or newsletter signups. You’re able to use the Advanced Access Manager to set up custom user roles and permissions.
Even better, Download Monitor lets you specify which users can access a download, under specific circumstances. This way, you can make sure a user can’t access downloads they are not entitled to. Combined with the ability to disable directory listing in WordPress, your site and its files are locked up.

Download Monitor
Grow your audience, track download performance, and convert your traffic into email subscribers with an easy-to-use digital downloads solution for WordPress.
Summing Up
There are lots of ways to shore up your WordPress website. However, there’s one that passes by a lot of users, especially if you aren’t savvy to what WordPress sets as a default. If you know how to do it, you’ll want to disable directory listing within WordPress to stop front-end users accessing the files and folders you want to protect.
The good news is that this is simple to achieve. While you need some SFTP and server knowledge, most of these skills are straightforward. Combined with a plugin such as Download Monitor, nobody will be able to access files that you have reasons to keep private.
Download Monitor offers a premium subscription for only $39 per year. What’s more, you get a no-quibble, money-back guarantee on every purchase.