
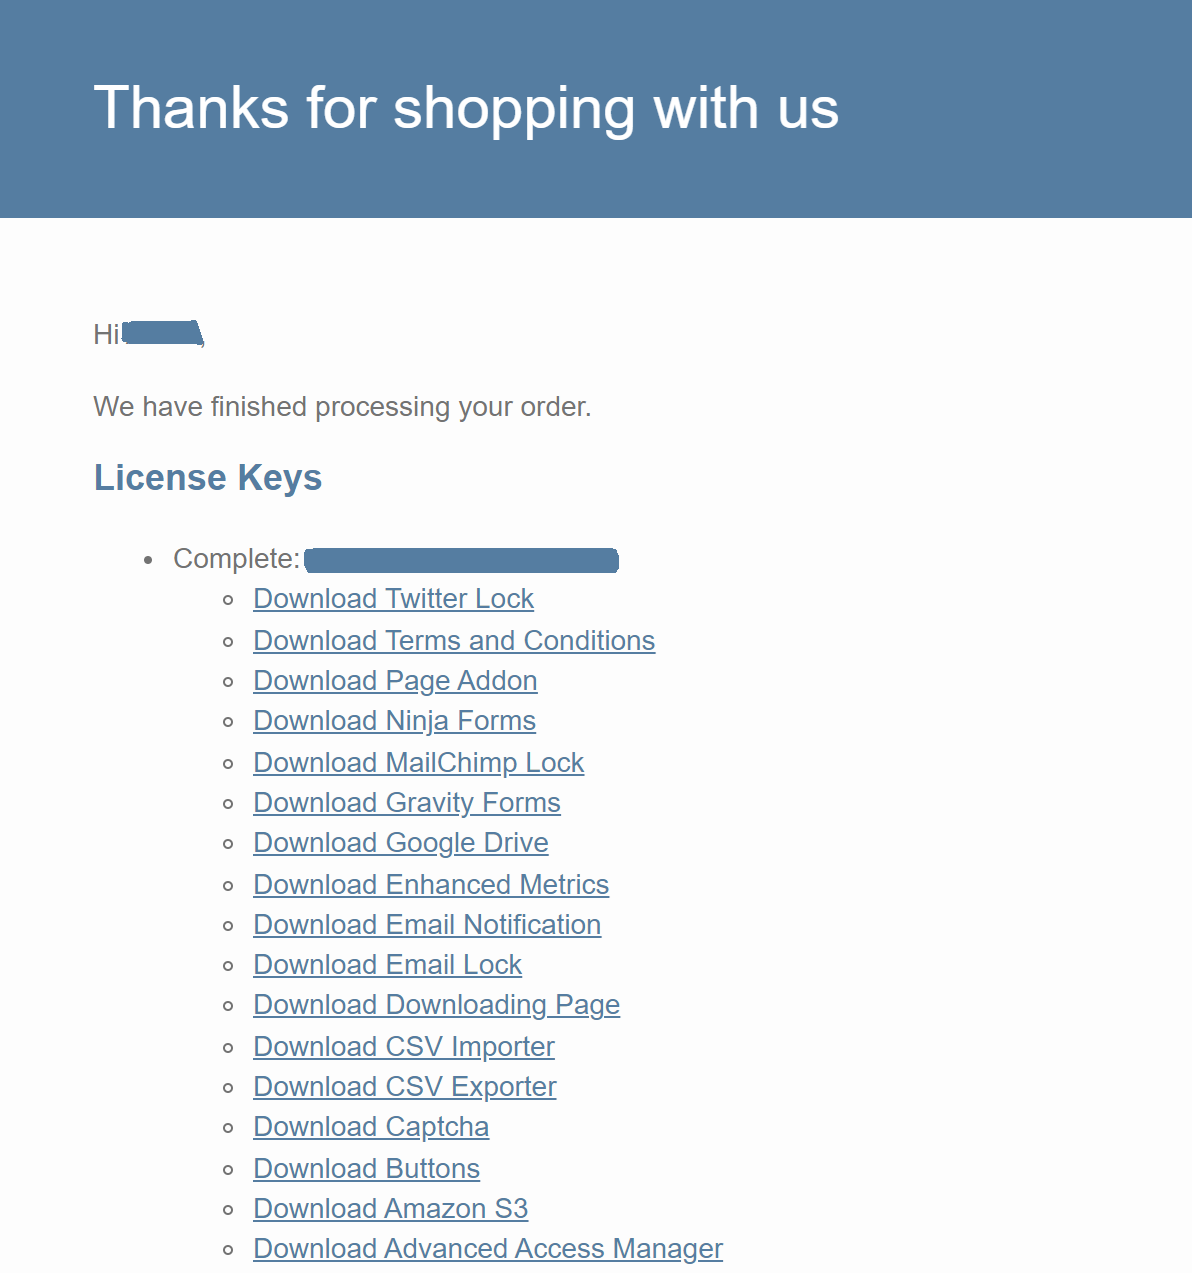
Depending on the package you purchased, you will receive a purchase confirmation email with the zip files for Download Monitor and its extensions after you finish your payment. The email will also contain your main license key, the one you need in order to activate the plugin.
Requirements
- Download Monitor free version installed;
- You have your license key at hand;
- 30s of your time.
How to activate your extensions
The license key allows you to use Download Monitor extensions and take advantage of updates and premium support. After your purchase, all license keys are valid for one year (except for Lifetime licenses).
If you are using the browser Safari on a Mac, when you download the zip file it extracts the file from the archive directly to your computer (you might only see the file folder with the plugin’s files in it, instead of the zip). If that is the case, then try and download the zip from your account using a different browser, or check your Trash, as the zip file should be there. To see how to prevent Safari from unzipping files please follow this tutorial.
Install and activate Download Monitor extensions
After you’ve made your payment, you’ll receive an email with all the information you need, as well as download URLs for Download Monitor extensions. Check your Spam folder as well! You can also find all your download information in your account.
- You’ll need to download the extensions on your PC. Click on each extension URL, and it will download automatically.
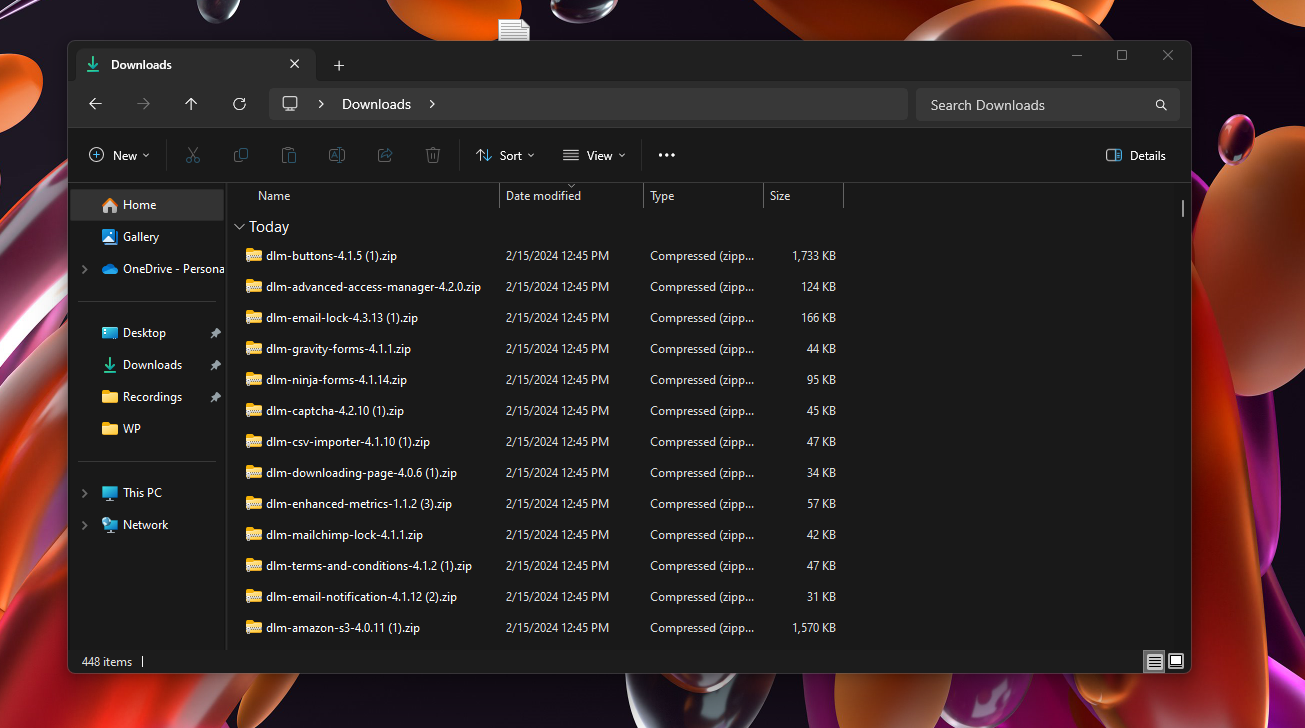
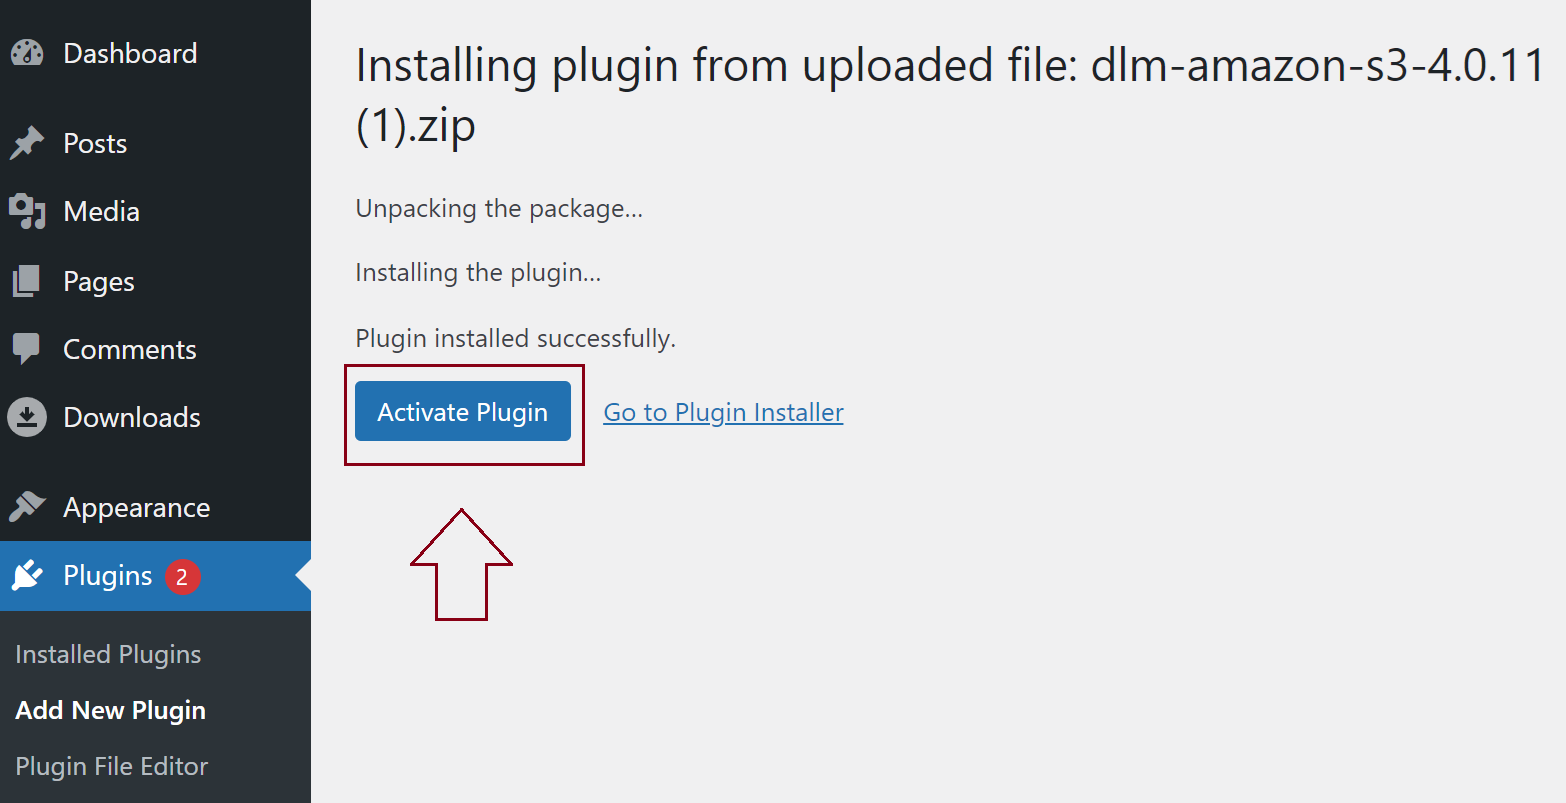
- After downloading the zip files, you’ll need to install and activate every extension one by one on your website. So, go to your website’s admin Dashboard > Plugins > Add new > Upload Plugin > Choose file > Select the zip file.

- Click on Install Now and Activate the plugin.
NOTE: For extensions to work, make sure also to have the free version installed. Otherwise, you will get an error message in your dashboard with the following format:
Download Monitor – [extension name] requires Download Monitor version 4.0.0 or higher to work.
Activate the license key
Go to your WordPress Dashboard > Downloads > Extensions > Installed Extensions. In this section, you’ll need to add the license key and email address, and click on Activate. This way the license will activate for each extension.

How to update your extensions
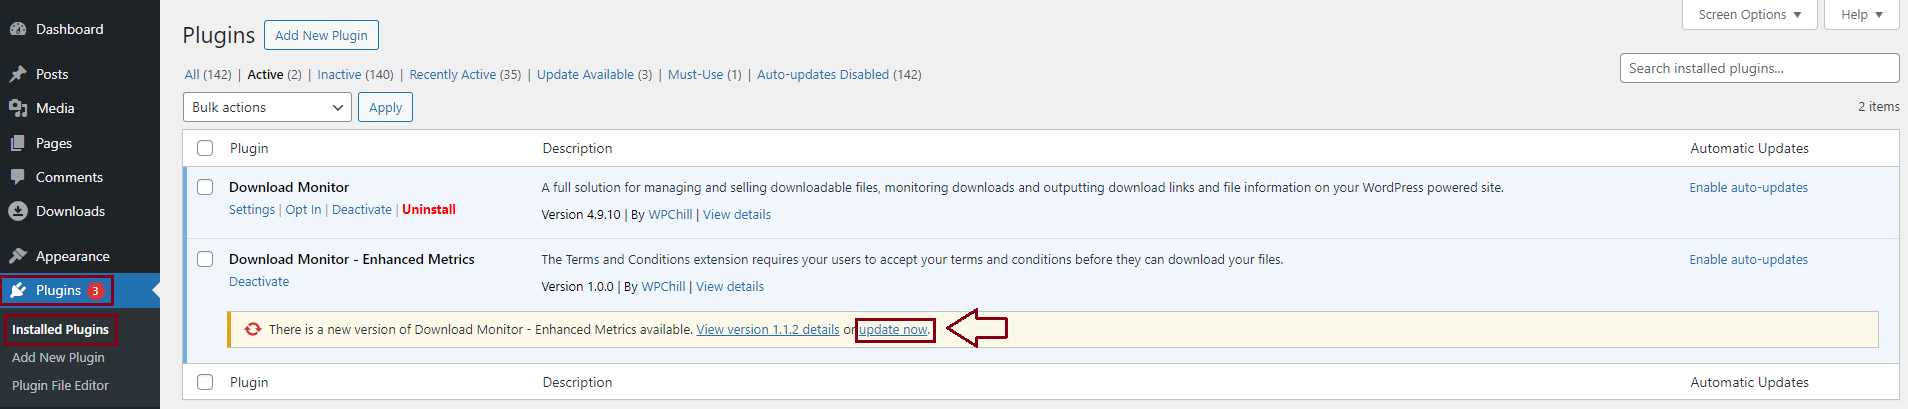
Update from your WordPress dashboard
If you go to your WordPress Dashboard > Plugins > Installed Plugins, you’ll see some notifications asking you to update the extension to a new version. All you need to do is click on Update now and wait a few seconds for the installation to complete.
Update manually
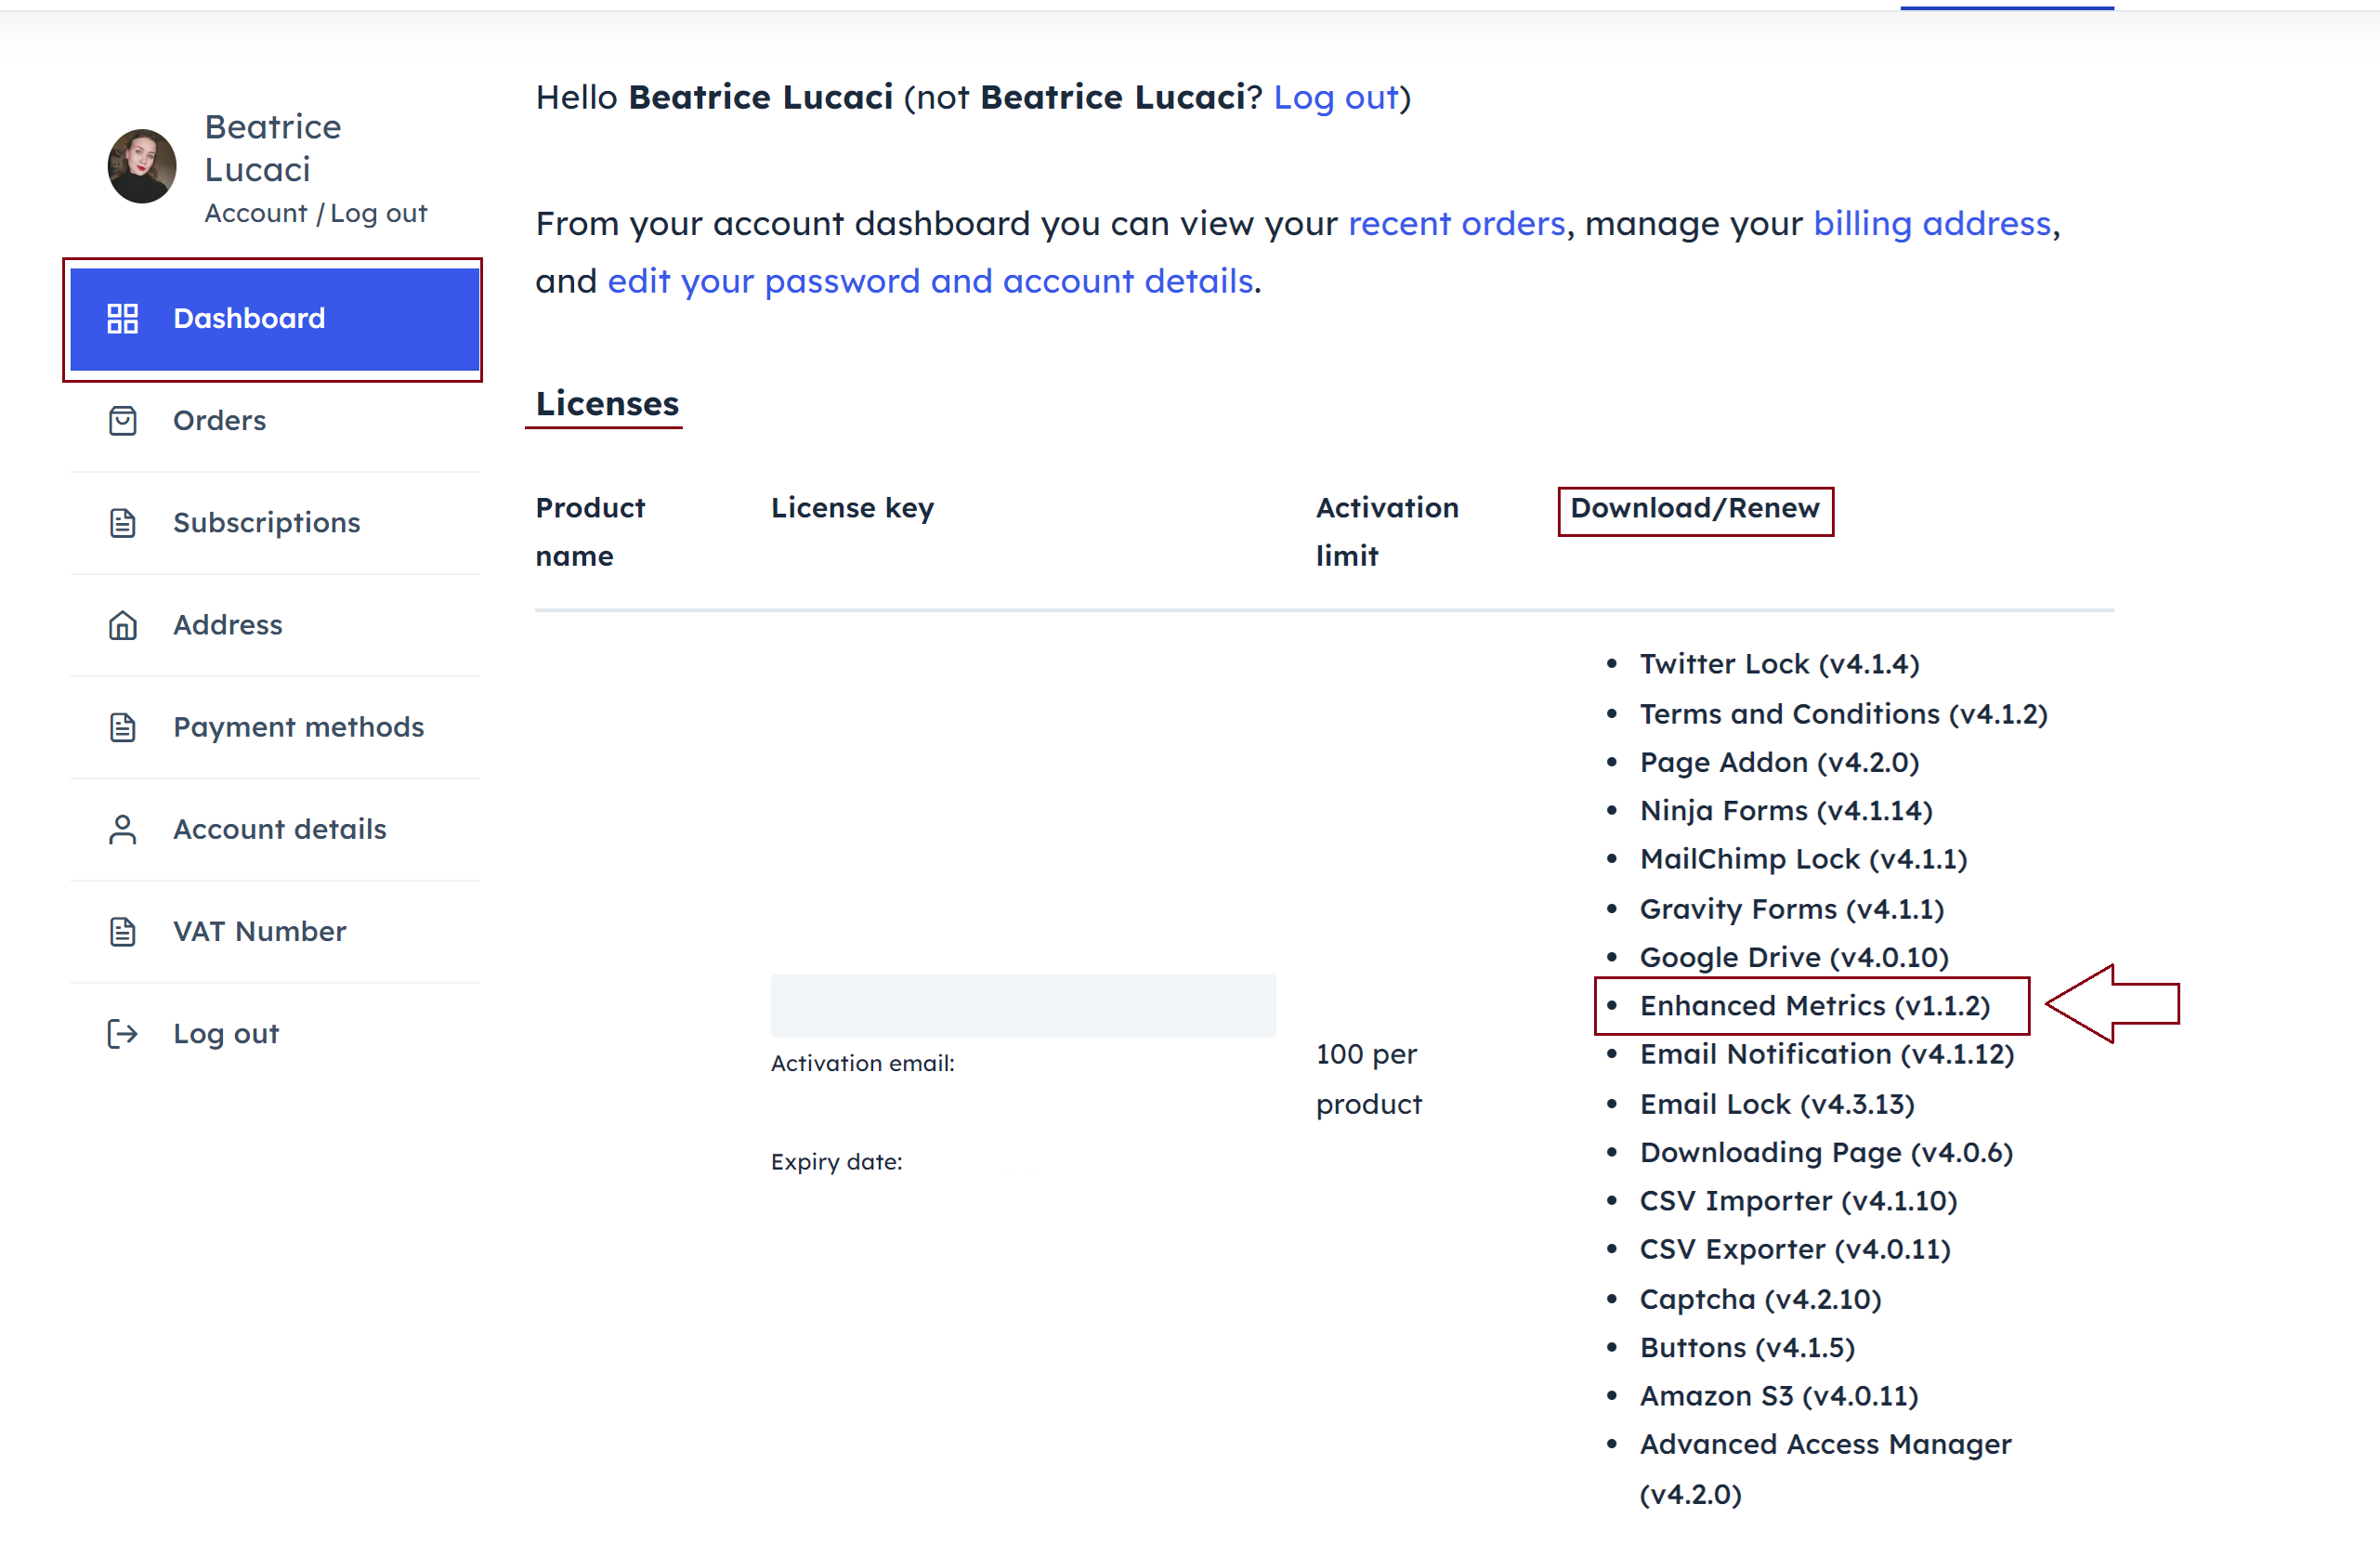
- Log in to your account here
- Go to Dashboard > Licenses > Download/Renew > click on the name of the extension to download its .zip file
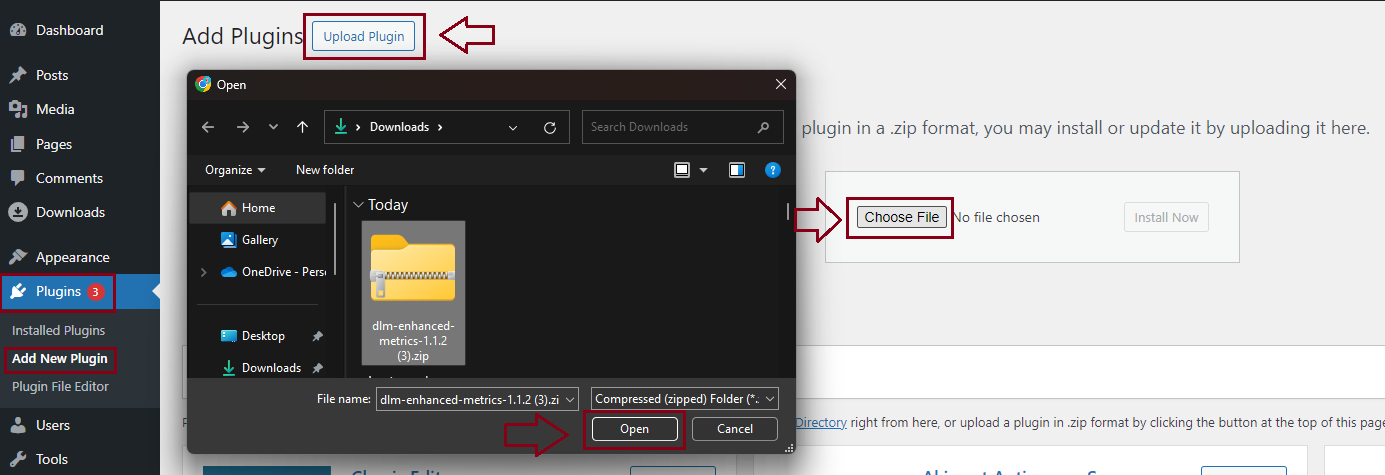
- Go to your WordPress dashboard > Plugins > Add New > Upload plugin > Upload the .zip file you downloaded
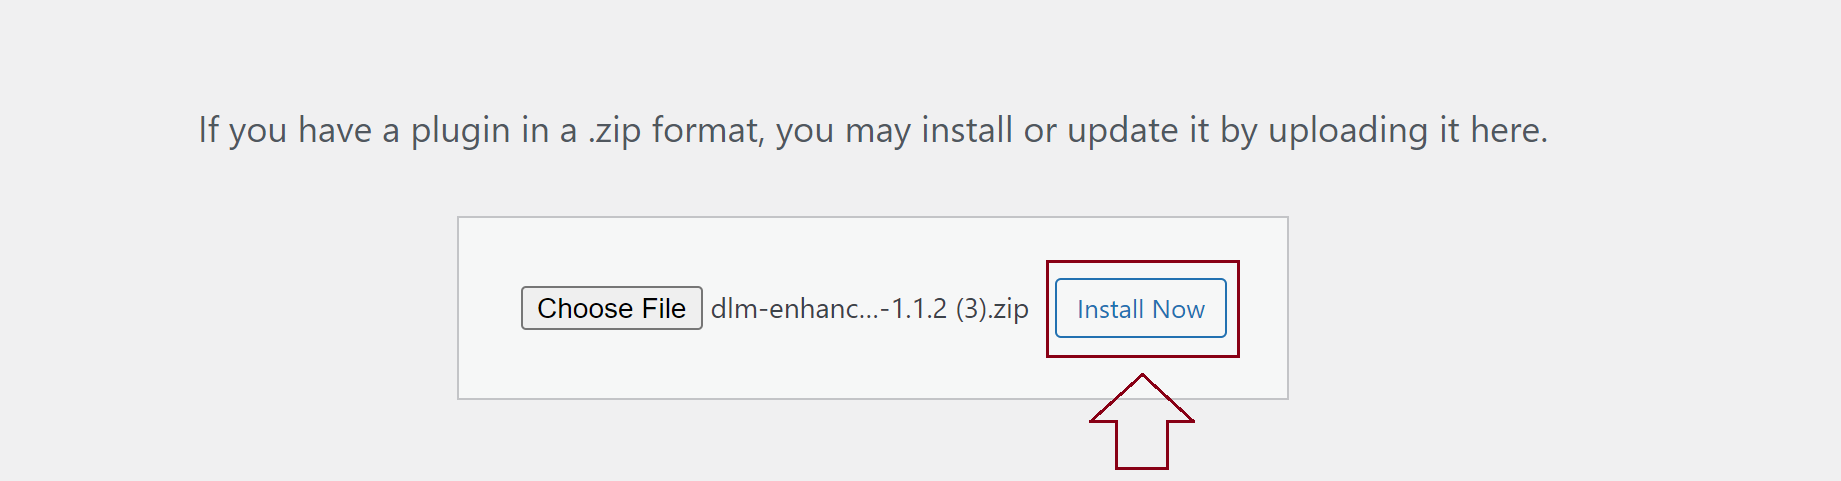
- Click on Install Now
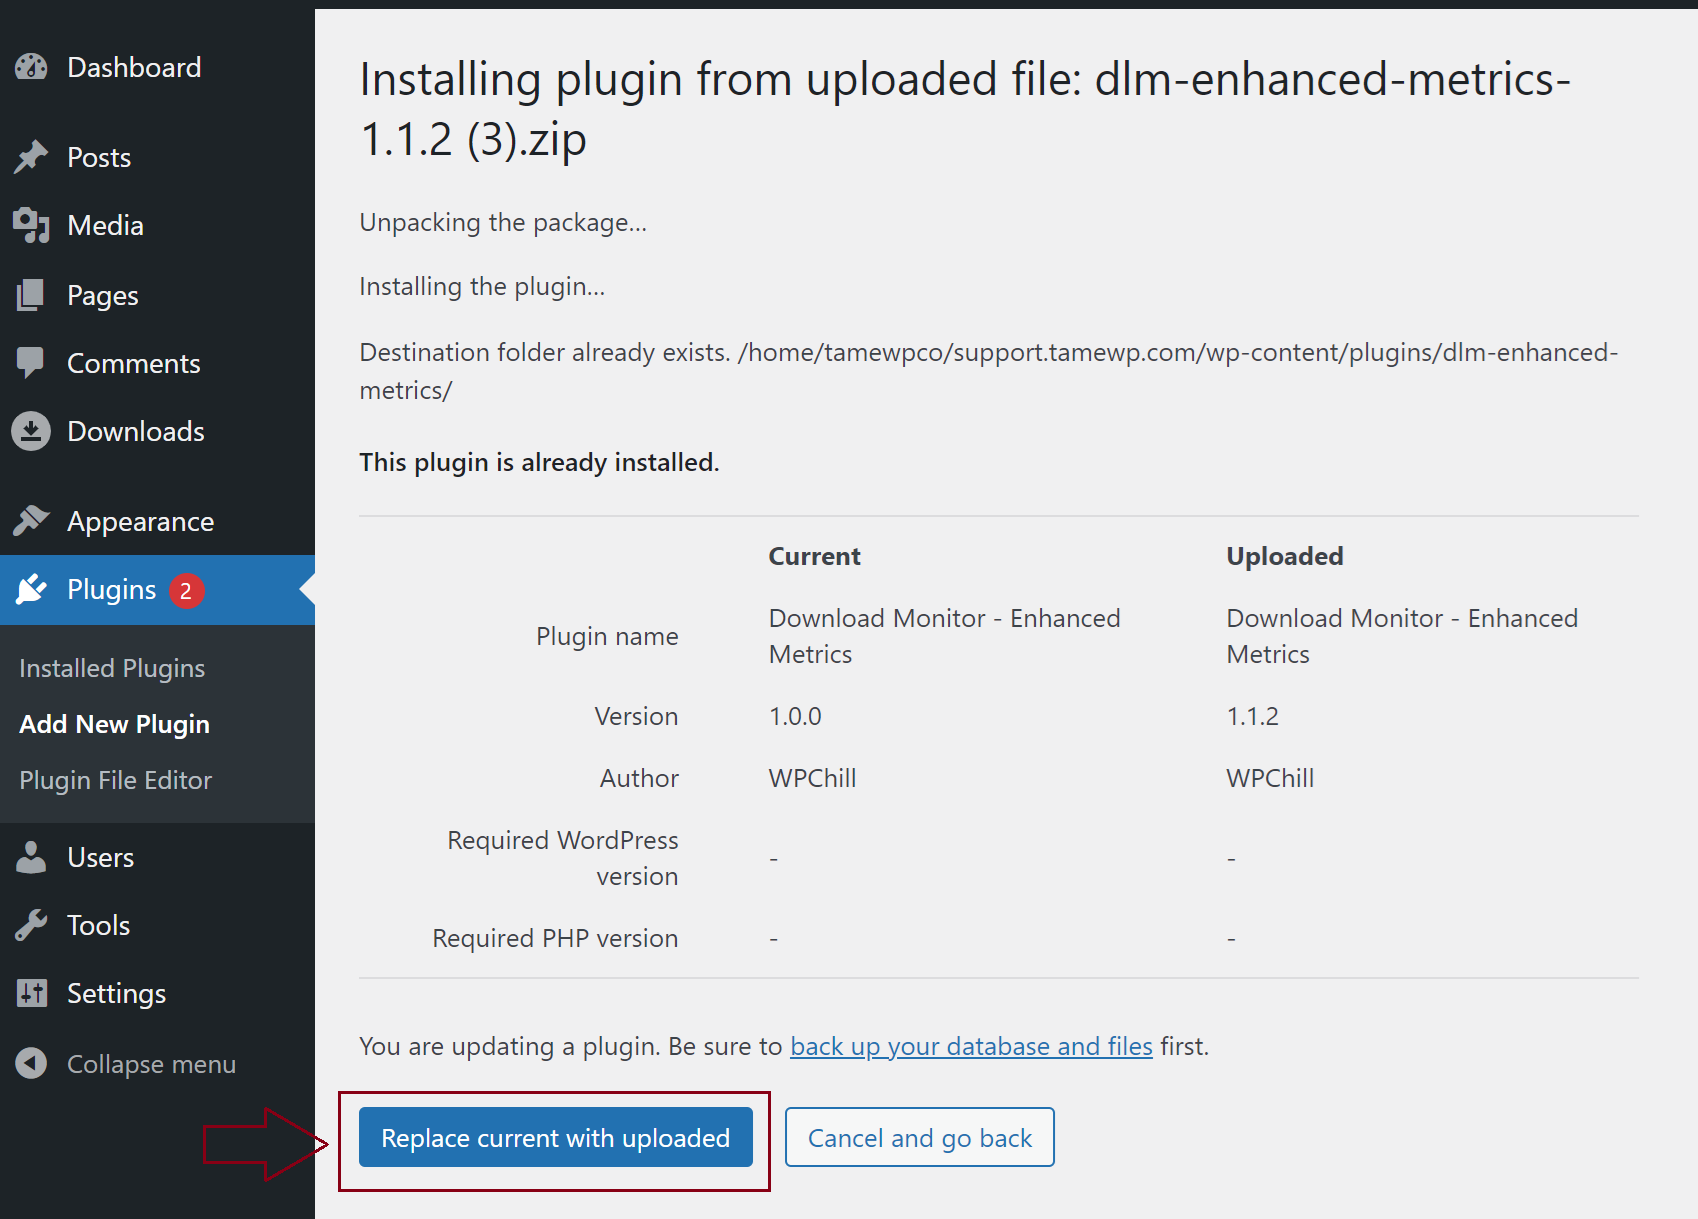
- Click on Replace current with uploaded
If you need to upgrade or downgrade Download Monitor, check out this article.