Mass import up to thousands of Downloads into Download Monitor with the CSV Importer. This user-friendly importer, with clear step-by-step instructions, helps you import Downloads including their categories, tags, and files into Download Monitor.
Installation
- Unzip and upload the plugin’s folder to your /wp-content/plugins/ directory
- Activate the extension through the ‘Plugins’ menu in WordPress
For more information on installing and managing plugins see here
Preparing the CSV file
Before you can start the import process you need to create a CSV file that contains the downloads and version you want to import. We’ve created an example CSV file you can use that contains the default headers, a sample download row, and a sample version row. Note the first column in the CSV file named type, this column defines if the row is a download or a version row. Here you can see the sample.
Adding multiple version
You can add as many versions to a file as you like by simply adding rows to your CSV file with version as type. It is important that the versions you add are directly after the download they should be linked to. Here are a few CSV example rows to demonstrate this:
- Download 1
- Version A
- Version B
- Download 2
- Version C
In this example Version A and Version B will be attached to Download 1 and Version C will be attached to Download 2.
Usage
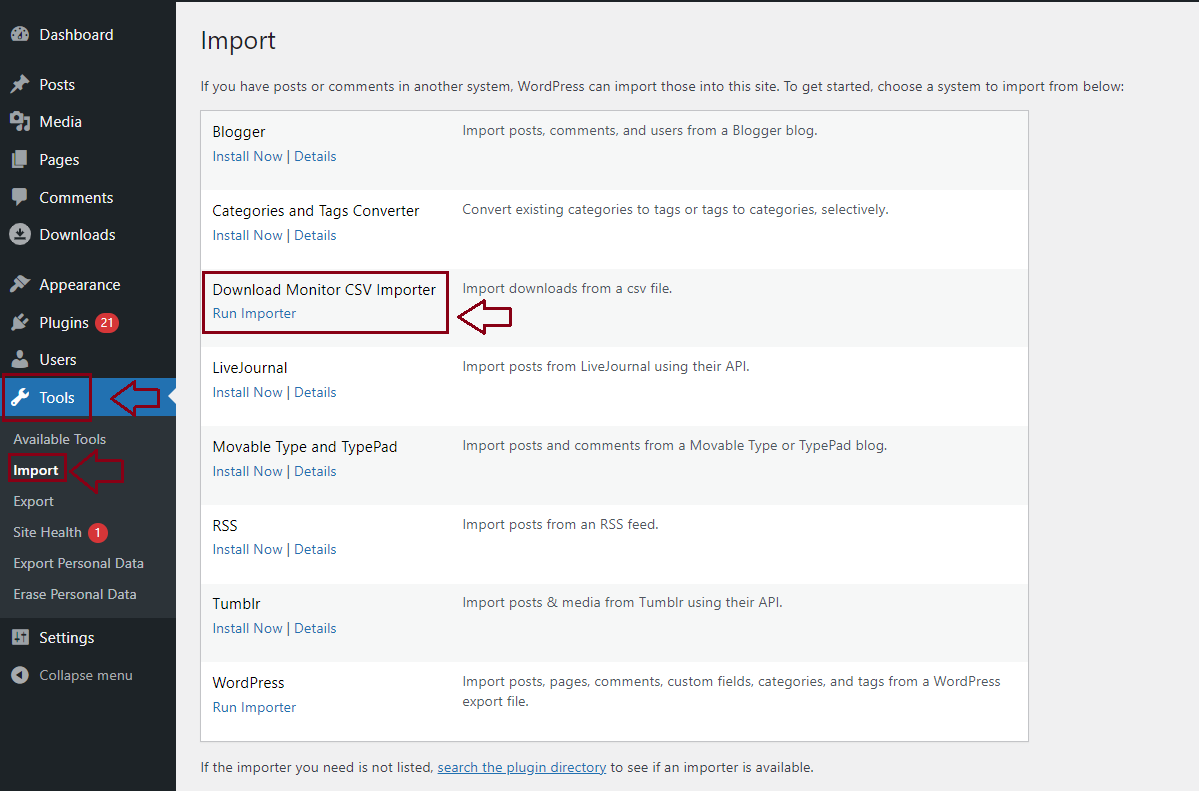
- After installing the extension head over to Tools > Import and click on the Run Importer link under Download Monitor CSV Importer.
- Upload the CSV file
At the first step of the CSV Importer, you select your CSV file and set the used delimiter. By default, CSV files use a comma,as delimiter but if you’ve created a spreadsheet on Mac using Numbers and exported it to CSV the delimiter is most likely a;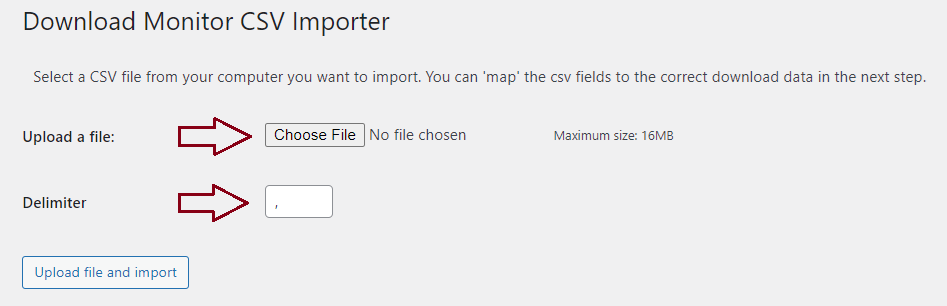
- Mapping the data
You can ‘map’ the columns found in the CSV file to download data fields. The extension will try to map as many columns automatically by recognizing what columns are in what fields.
Note that this overview contains both download and version fields, not all fields are used in every row because download rows take different fields than version rows.
After you’ve mapped all columns you want to import to Download Monitor fields press the Start Import button.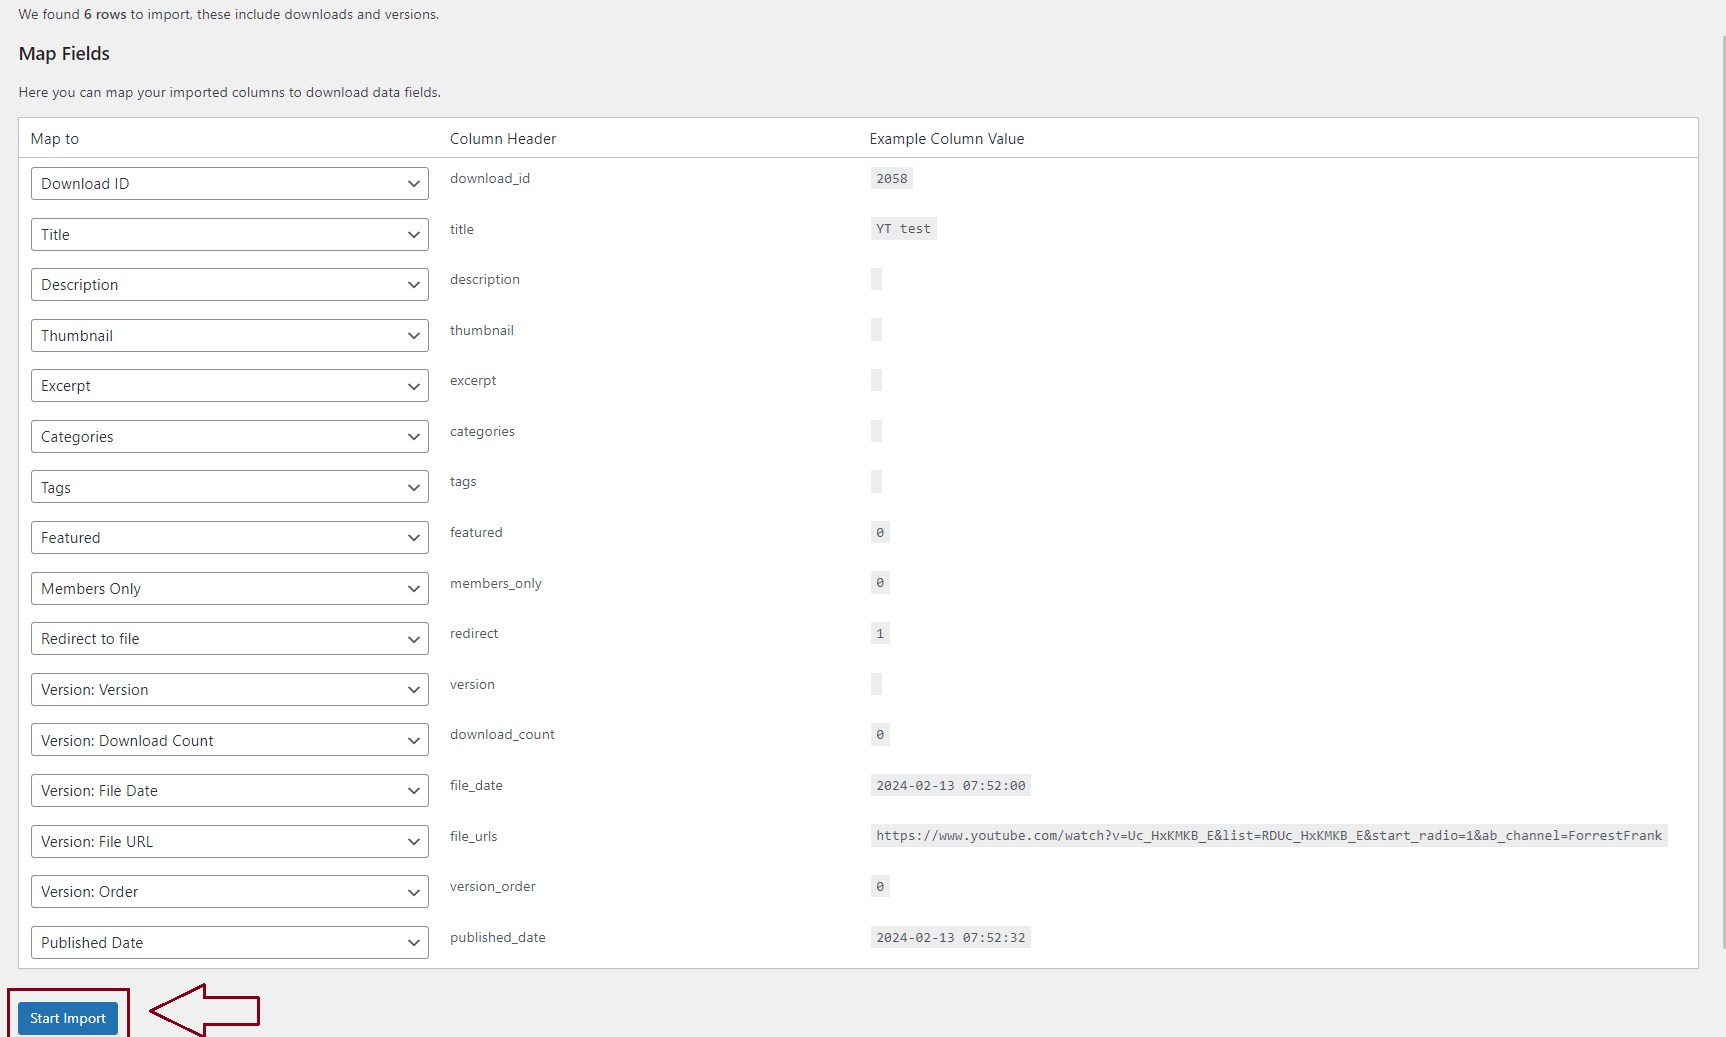
After the import is done you will be redirected to a page telling you how many downloads have been imported.
Troubleshooting
My csv file won’t upload on my Multisite
In WordPress Multisite(Network) you need to add the CSV file extension to the list of allowed file extensions in the network-wide general settings.

FAQ
Enter all categories/tags you want to attach to a download in one column separated by a pipe |.
Enter all file URLs in one column separated by a pipe |.
Yes, you can! Simply add them to your CSV file and select ‘Custom Meta’ in the mapping screen. A new text field will appear, enter the desired meta_key in this text field. The importer will now import the values of this CSV column to the entered meta_key. You can enter the same meta_key multiple times for multiple columns as we add the meta values instead of replacing them.

Our Download Monitor CSV Importer extension only helps you to import the downloads, not the reports section.
If you want to move that section from your live site to another, then it is necessary to do a back-up to the database first, and then you need to copy from the database on the live site these tables: download_log, dlm_downloads and dlm_reports_log and move them on the other one.