
The No Access Page feature allows you to create a customized page to be displayed when users do not have access to a file. In this article, we’ll guide you through the process of setting up a No Access Page and changing the message displayed when access is denied.
Creating a No Access Page
- Page Creation: To create a No Access Page, start by adding a new page to your website. To do this go to your WordPress admin dashboard > Pages > Add new. We recommend naming this page “No Access Page“.
- Adding Shortcode: Once your page is created, insert the
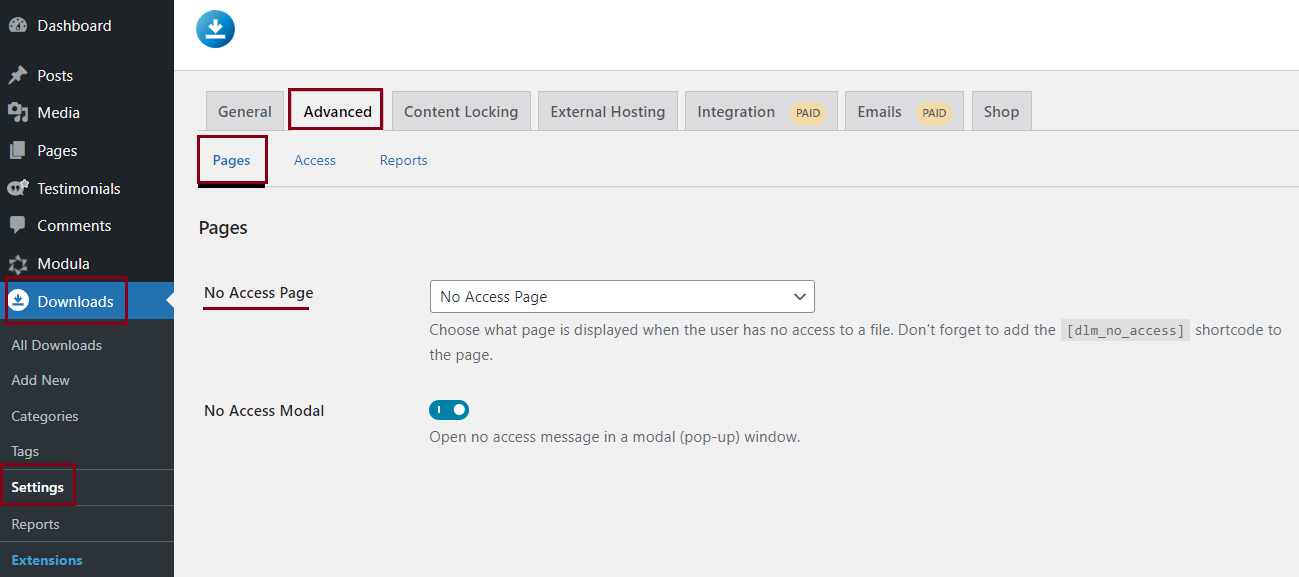
[dlm_no_access]shortcode into the page content. This shortcode is essential to inform the system that this is the designated No Access Page. - Page Selection: After adding the shortcode, navigate to your WordPress dashboard and go to “Downloads” > “Settings” > “Advanced” > “Pages” Here, you will find the “No Access page” option. Select the “No Access Page” you just created from the dropdown menu. This ensures that this page will be displayed whenever a user is denied access to a file.
Customizing the No Access Message
If you want to modify or remove the message displayed when a visitor is denied access to a file, follow these steps:
- Access the Settings: In your WordPress dashboard, go to “Downloads” > “Settings.”
- Navigate to Advanced Settings: Click on the “Advanced” tab in the settings menu.
- Access the Access Section: From the Advanced settings, select “Access.”
- Edit the No Access Message: In the “No access message” field, you can replace or remove the default message. This allows you to tailor the message to better suit your website or to communicate any necessary information to users when access is denied.
- Save Changes: Be sure to save your changes to ensure the updated message takes effect.

By following these steps, you can create a personalized No Access Page and adjust the message that users see when they are denied access to a file on your website. This customization not only enhances the user experience but also provides clear and concise communication with your audience.