We don’t have to tell you running a website selling digital products is easy. You know the answer to that, it’s hard work.
What if we told you there is a way to make things easier for you and your customers and increase revenue simultaneously?
To answer this, let’s look at an example: Your website offers different digital products. Some products may be relevant for beginners, while others aim at more advanced users.
Membership subscriptions could offer a mix of products/services at one level and another combination for another level.
Once the subscriptions are created, you can link certain downloads to a specific membership level.
Sounds complicated? It isn’t; creating subscription packages/levels offers your potential customers more freedom of choice. In turn, this generates more revenue for you.
Table of contents
So how do you do this?
You could go down the custom-coded route, but this could be expensive and time-consuming. Your time is precious and better spent elsewhere, like boosting your digital product inventory!
The other way? You might be surprised by the answer.
You only need two plugins.
Introducing Download Monitor and Restrict Content Pro
Both plugins have unique features, forming a powerful alliance when combined. Not unlike Marvel’s Avengers. 💪
First, let’s look at the best way to manage the downloads on your WordPress website.
Download Monitor
Over 100,000 people use Download Monitor to manage their digital downloads. They use it because it does what it says on the tin; it helps you manage and track your digital downloads.
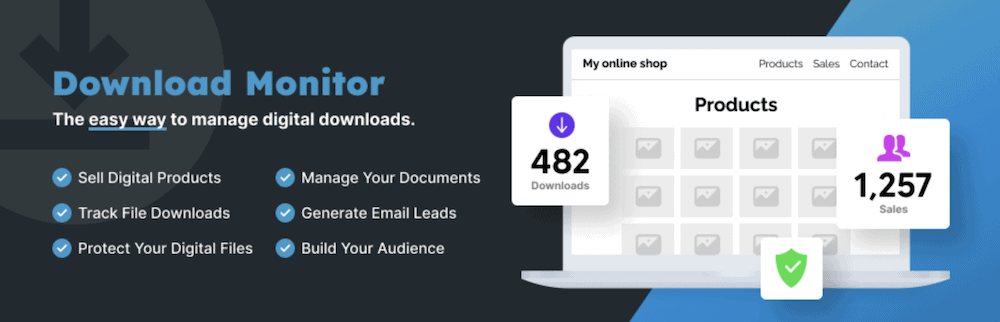
When organizing and managing your downloadable files, accept no substitute! It doesn’t end there; there’s more to Download Monitor:
- It uses the familiar WordPress interface; therefore, you can use Download Monitor similarly to posts and pages.
- Sets up a mirror or alternative links to downloads to keep uptime high.
- A complete versioning system, which is only the surface level of the organization Download Manager provides.
- Use WordPress’ taxonomy system to categorize and tag your downloads.
What’s more, you have several ways to display downloads. For example, there’s a dedicated Download Manager Block.
There’s also the ability to sell downloads from your site and expand the plugin’s functionality using the Extension Library.
A premium subscription is the best way to access everything Download Monitor offers.

Download Monitor
Grow your audience, track download performance, and convert your traffic into email subscribers with an easy-to-use digital downloads solution for WordPress.
Restrict Content Pro
Restrict Content Pro is an excellent choice for limiting access to certain parts of your website, including individual downloads.
It has many features that can help you set up access restrictions throughout your entire website:
- It is easy to create different membership levels and manage them from WordPress.
- The plugin has built-in solid content restrictions. For example, you can use user roles, access levels, and membership tiers.
- You can also create content previews to give users a sneak peek of what they can access with a full subscription.
- Like Download Monitor, Restrict Content Pro also has an Extension Library, which allows you to integrate third-party solutions into the plugin and create a comprehensive content restriction system within WordPress.
Restrict Content Pro costs $99 annually and gives you full access to all its features. You don’t have to purchase the pro version; this tutorial uses the free version!
Our Example and How to Link Downloads to Subscription Plans in WordPress (without code)
Let’s dive into a more fleshed-out example of what we’re trying to achieve.
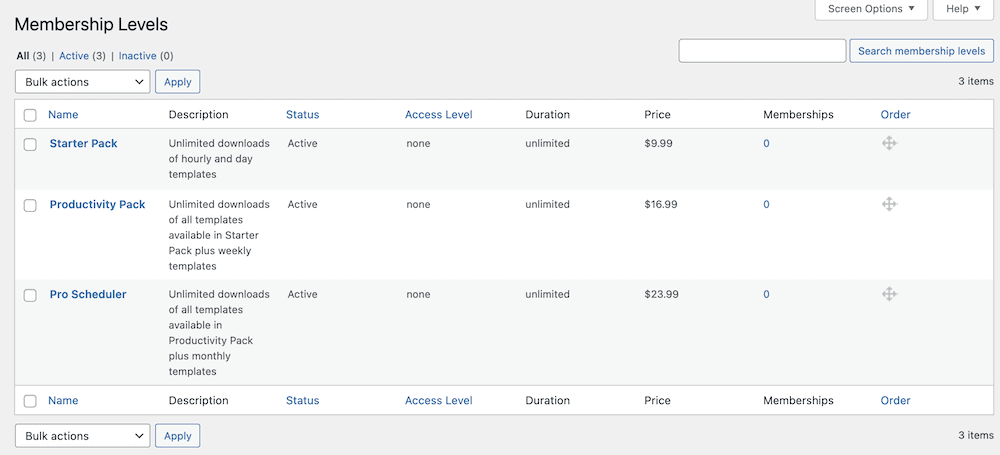
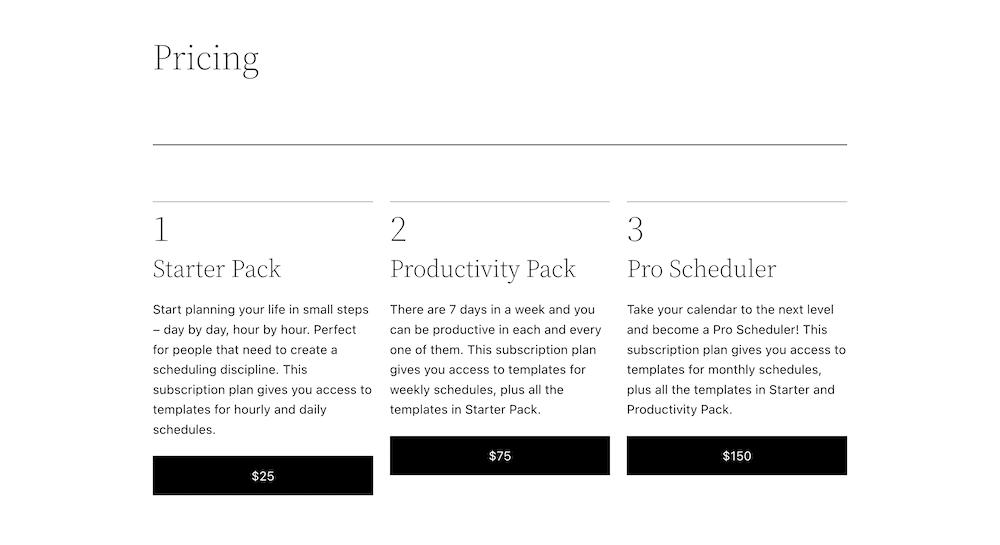
- Our website will have three subscription options: Starter Pack, Productivity Pack, and Pro Scheduler.
- Each option is a one-month rolling membership that grants access to scheduling templates.
- Each membership also includes a corresponding download pack that varies in size depending on the membership level.
For instance, someone with the Starter Pack will be restricted from accessing the files in the Productivity Pack or Pro Scheduler pack.
However, a Pro Scheduler subscriber will have access to everything in the other two packs. Then all we have to do is connect downloads to our subscription plans.
If this sounds confusing, don’t worry, we’ll guide you through the solution. Using Download Monitor and Restrict Content Pro makes the process a breeze.
A 5-Step Process to Link Downloads to Subscription Plans in WordPress
You’ll need to install and activate both plugins and the Download Monitor extension for Restrict Content Pro before uploading files on your site.
1. Add Your Downloads to Your Site
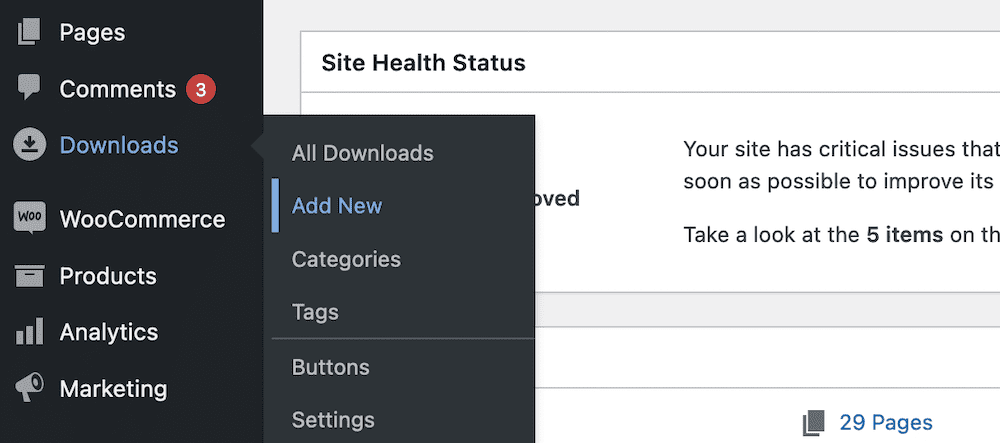
Download Monitor makes it easy to add new downloads to your website. You can access the feature by going to the WordPress dashboard and clicking on Downloads > Add New..
You’ll feel right at home here, as Download Monitor uses the native WordPress editor for adding downloads:
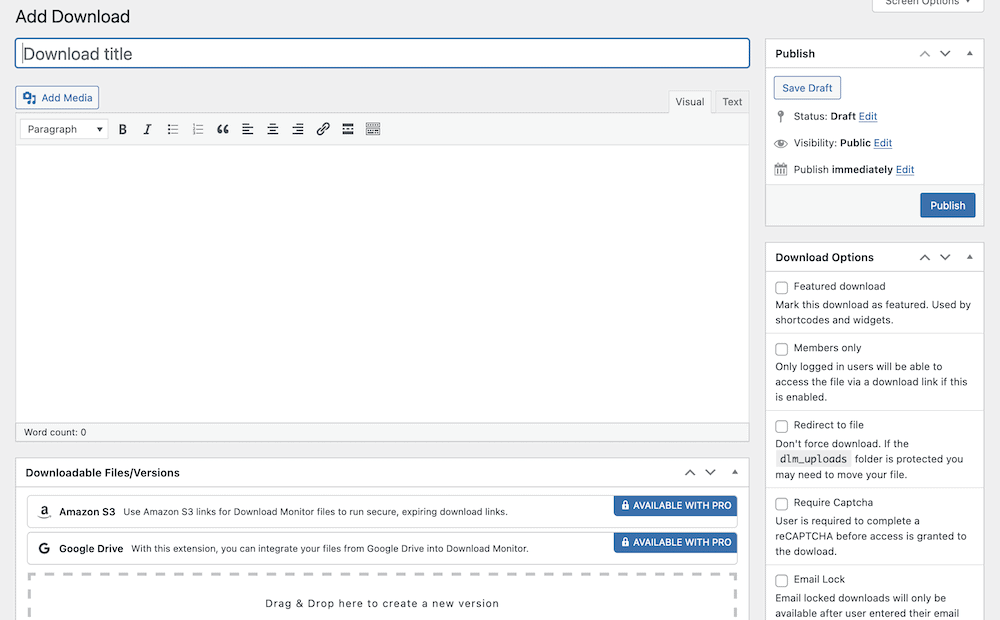
Once you have set a title and description for your download, scroll down to the bottom of the screen. You will see the Downloadable Files / Versions section, where you can add a file:
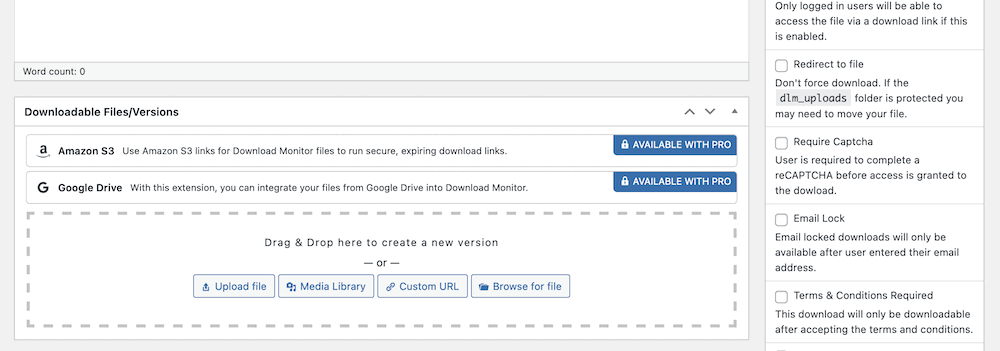
The most common method of adding a file is using the “Upload File” or “Media Library” buttons. You also have the option to add a custom URL or select a file from your website’s server.
After uploading the file, you can edit its metadata before publishing it. You can also add multiple files for download.
Once you’re happy with everything, you can move to the Restrict Content Pro settings to manage your membership levels.
2. Create Membership Levels Using Restrict Content Pro
Restrict Content Pro is excellent for creating membership levels and tiers within WordPress.
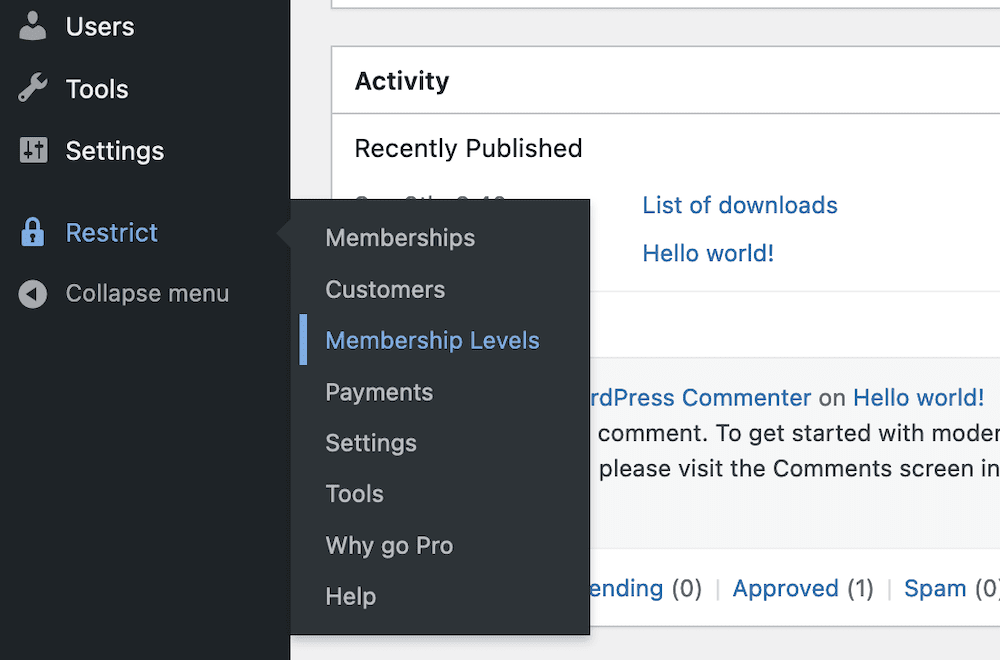
Go to the WordPress dashboard and click on Restrict > Membership Levels.
It’s here you can create new membership levels for your website. The fields are easy to fill out, and the Restrict Content Pro documentation has helpful information on each section’s meaning if you need assistance.
After you have created your levels, you can view them easily on the Membership Levels screen.
You can begin to display these tiers to users and link downloads to them afterward.
3. Add access rules with Download Monitor – Advanced Access Manager
The Advanced Access Manager extension enables you to set advanced restrictions on your downloads, individually and globally.
With this extension, you can create access rules based on a combination of roles, users, and IP addresses. Which allows you to create a highly customized access system for your downloads.
In our case, we will use the extension to limit users to their plans. To do so, go to each download and click on edit.
Scroll down to the rules section and click on Add a rule button.

Now in our situation, we have three main packs (Starter, Productivity, and Pro Scheduler packs).
Naturally, the rules should reflect the following conditions:
- The Starter pack – can only access the Starter files.
- The Productivity pack – can have access to the Productivity files, as well as the Starter files.
- The Pro Scheduler pack – can access Pro Scheduler files, Productivity files, and Starter files.
We can add another rule so that if anyone else that doesn’t have an active plan tries to click on the link, they won’t be able to download it.
.
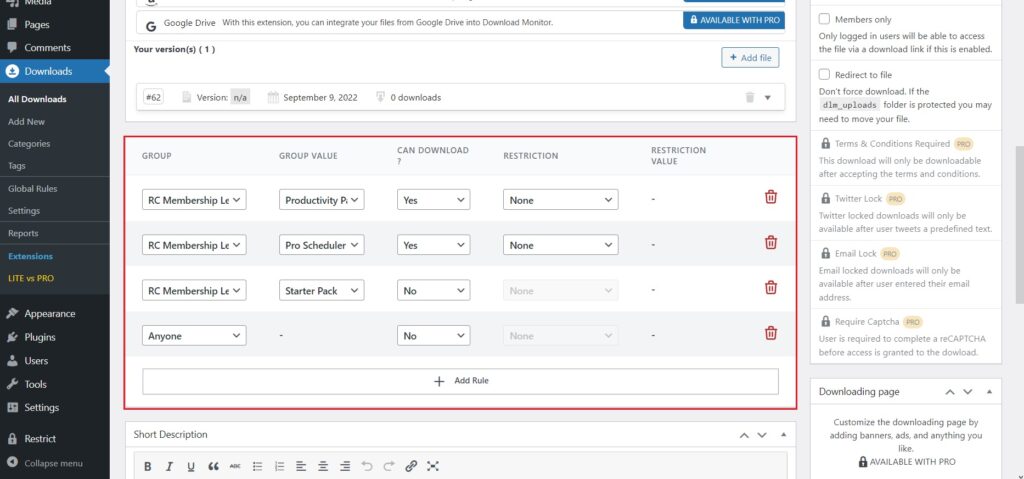
In the example above, the download is unavailable for users subscribed under the Starter Pack. Only Productivity Pack and Pro Scheduler subscribers can get the file.
For more info on Advanced Access Manager, make sure to visit our documentation.
After you have established the rules for each pack, it’s time to create a pricing table on a page and link it to the registration page.
4. Creating a Pricing Table and Link to the Registration Page
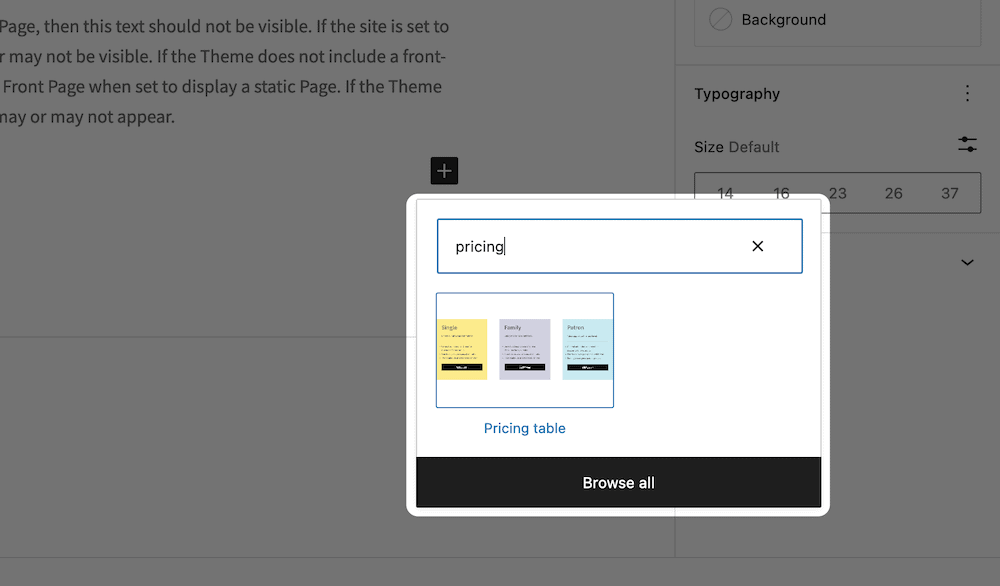
A pricing table is a popular way of showing your subscription or membership levels.
There are many ways to do this in WordPress. The easiest way is to add the pricing table section from the Block Editor.
You can find it by searching for it in the same way you would for a Block:
From here, you can make changes to the content, adjust the color scheme (to fit your website), and more:
The buttons for each level should allow the users to purchase the desired plans, so you will need to add the URL for your registration page.
Restrict Content Pro automatically creates this page when you activate the plugin.
To find this URL, go to the page and copy it from the front end. Then, paste it into the link field for each pricing table option.

There’s one more step you should take to help restricted users understand why they might not be able to access a download.
5. Create and Set a ‘No Access’ Page Within WordPress
The final step is to create a “No Access” page. If the user doesn’t have a valid subscription or membership, this is the page they will see.
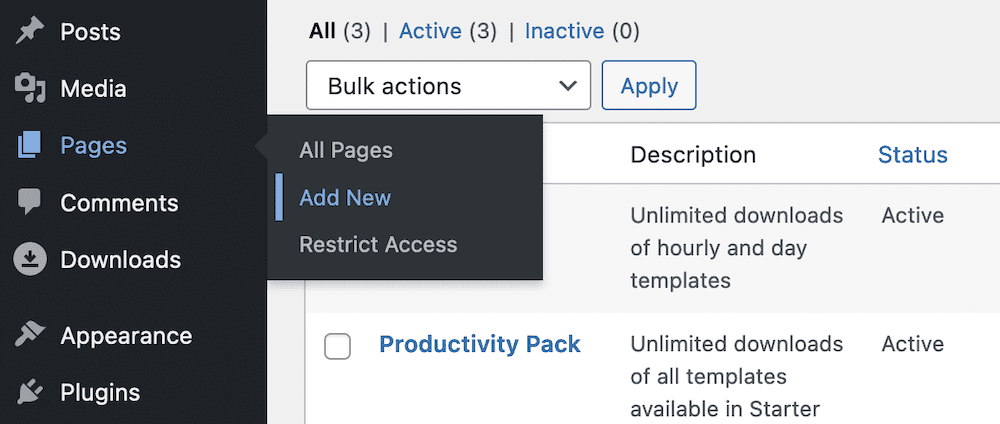
The process is easy. Start creating a new WordPress page by going to Pages > Add New.
Next, give your page a clear and descriptive title, add some content to explain why the user sees this page, and add the following shortcode: [dlm_no_access].
You can also use this page to point users to your pricing page, where they can enroll in a membership plan.

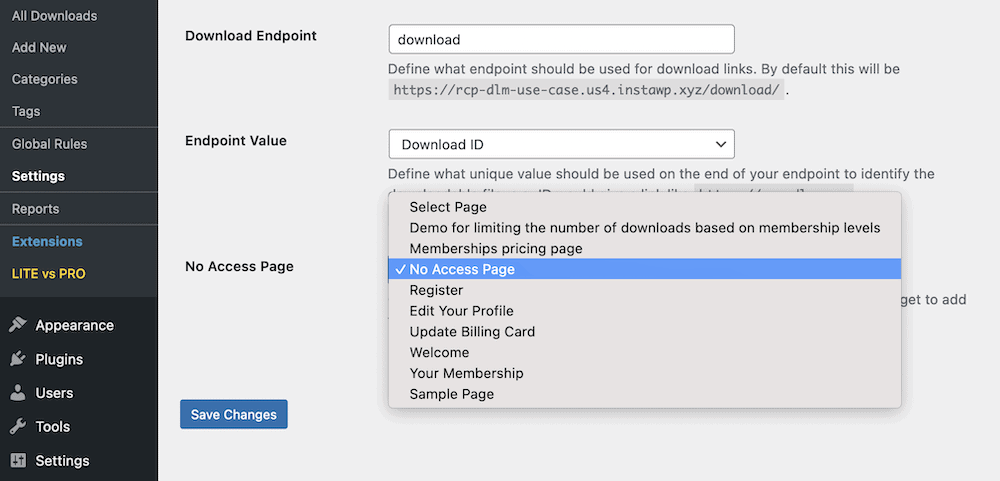
Lastly, we need to set the “No Access” page in Download Monitor. To do this, go to the WordPress dashboard, click on Downloads > Settings > Advanced tab, then select your created page from the “No Access Page” drop-down menu.
Once you save your changes, all of the elements you need to link downloads to subscription plans in WordPress will be in place!
Conclusion
Combining Download Monitor and Restrict Content Pro provides a complete no-code solution for managing downloads and restricting content on your WordPress site.
Whether you’re selling photographs, graphics, PDFs, or any other digital product or service, following our tutorial, you could be up and running in no time.
Don’t forget Download Monitor comes with a 14-day money-back guarantee on all purchases!
Download Monitor
Grow your audience, track download performance, and convert your traffic into email subscribers with an easy-to-use digital downloads solution for WordPress.