Imagine you’ve visited a website with tons of downloadable content and find yourself endlessly scrolling through pages of downloads. It seems frustrating & time-consuming. Right???
In the same way, if you’re offering many downloadable files, you must showcase them interactively to enhance your visitors’ navigation experience.
Displaying hundreds of files on a single page can frustrate your site visitors and make them leave the page without taking any action.
So, how can you solve this problem? By Paginating Your Downloads. 💡
By breaking up your downloads into smaller, more manageable chunks, visitors can easily navigate your content and find what they’re looking for without getting overwhelmed.
In this blog post, we’ll walk you through the steps to add pagination to your downloadable content in WordPress. Whether you’re a novice user or an experienced coder, our simple guide will help you improve your visitors’ experience and keep them returning for more. So let’s get started!
Why Add Pagination to Your Downloads?
One of the critical factors why you should consider adding pagination as it enhances your visitors’ navigation experience with your downloadable files.
Also, pagination has numerous benefits, including:
☑️ Adding pagination allows you to break up your long downloads list into multiple sections with limited files on each page. This allows your visitors to browse each file with more focus.
☑️ Pagination also improves your page’s performance, as it reduces the amount of content loaded at once.
☑️ You can add pagination to your downloadable content based on different parameters such as categories, dates, recently added, and much more. This allows you to manage your digital downloads more effectively.
How to Paginate Downloads With Download Monitor
Now, you are probably thinking about how you can paginate your downloads.
If you’ve got a website built on WordPress, you can use our plugin Download Monitor. It is a user-friendly plugin allowing you to manage your digital downloads easily.
Download Monitor comes with a familiar WP interface, making adding, editing, and removing your downloads a breeze.
You can display multiple downloads and sort them by title in WordPress. And if you want to sort downloads by publishing date, you can do that too!
Including all the shiny features, we’ve also created a unique shortcode that allows you to paginate your WordPress downloads and showcase them interactively.
So without any further ado, let’s get started.
If you’re an existing user of Download Monitor, you can directly skip to the #Step 3.

Download Monitor
Grow your audience, track download performance, and convert your traffic into email subscribers with an easy-to-use digital downloads solution for WordPress.
Step 1: Install and Activate Download Monitor
The setup process of the Download Monitor is straightforward and super easy. Like any other WordPress plugin, you can install & activate it directly from your WordPress Dashboard or download a file from WordPress.org.
Let’s learn how to install Download Monitor through the WordPress admin panel!
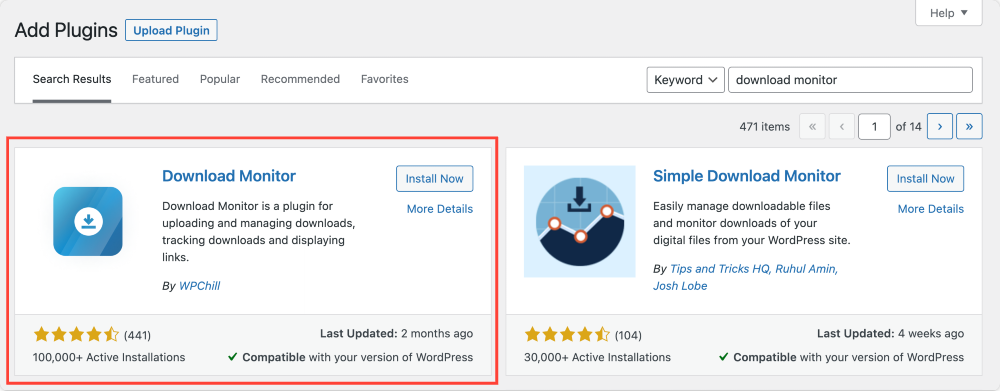
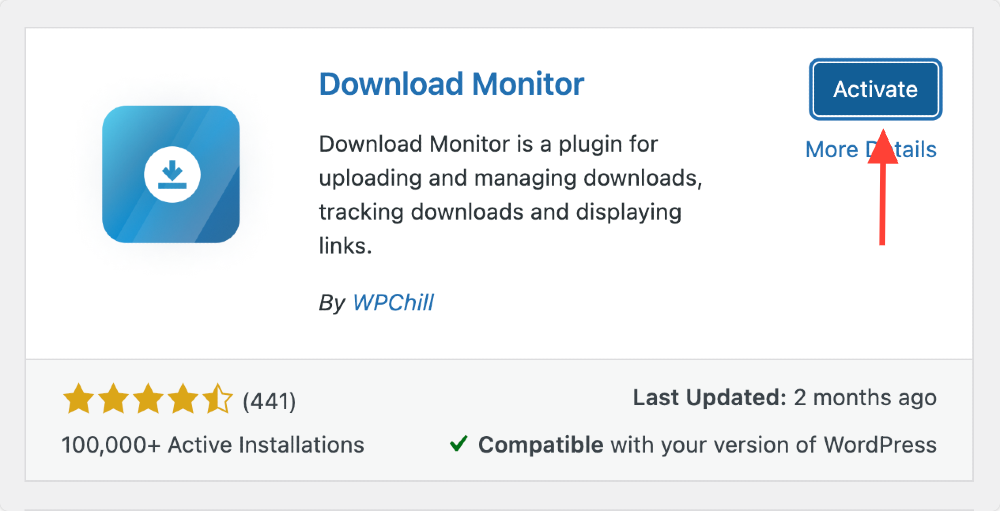
Login to your WordPress website, and go to Plugins >> Add New. Once the plugins’ page opens, type Download Monitor into the search bar and click the Install Now button.
Once the installation is done, don’t forget to hit the Activate button.
Step 2: Create Downloads
Now that Download Monitor is up and running, you can create your digital downloads.
To do that, first head over to your WordPress dashboard and click on Downloads >> Add New.

Doing so will open the Download Monitor interface. Here you need to add the download title, upload the file and choose the category to create downloads.
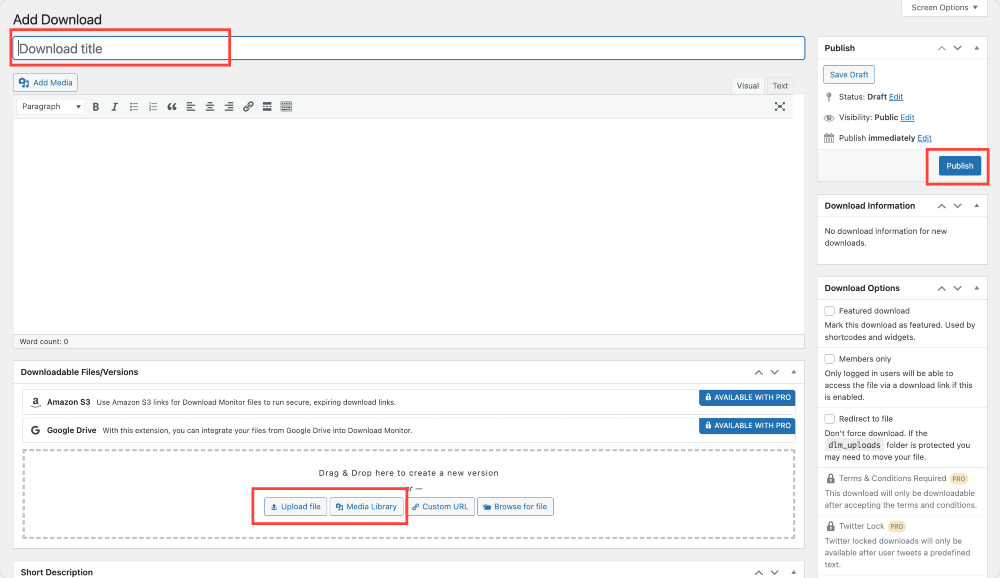
Ensure to repeat the process for each individual file and choose the right category.
For a more detailed guide on creating your first download, check out our detailed documentation guide.
[Note: Category plays an important role here, as our pagination shortcode displays the result based on categories, so make sure you choose the right category for your downloadable files.]
For our tutorial, I’ve created fifteen downloads of images in .jpg file format and assigned them an Images category.

Step 3: Paginate Downloads Using Download Monitor
If you want to display all your downloads on a single page, you can add the shortcode [downloads] in the Shortcode block of the page/post editor.
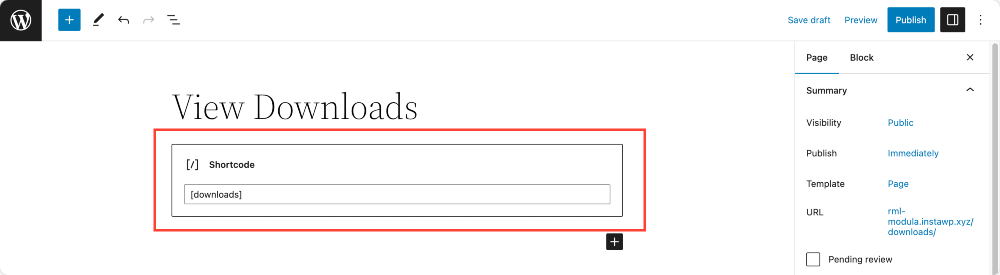
Just paste the shortcode, & publish the page. And it will display all the downloads in the order in which they were uploaded.
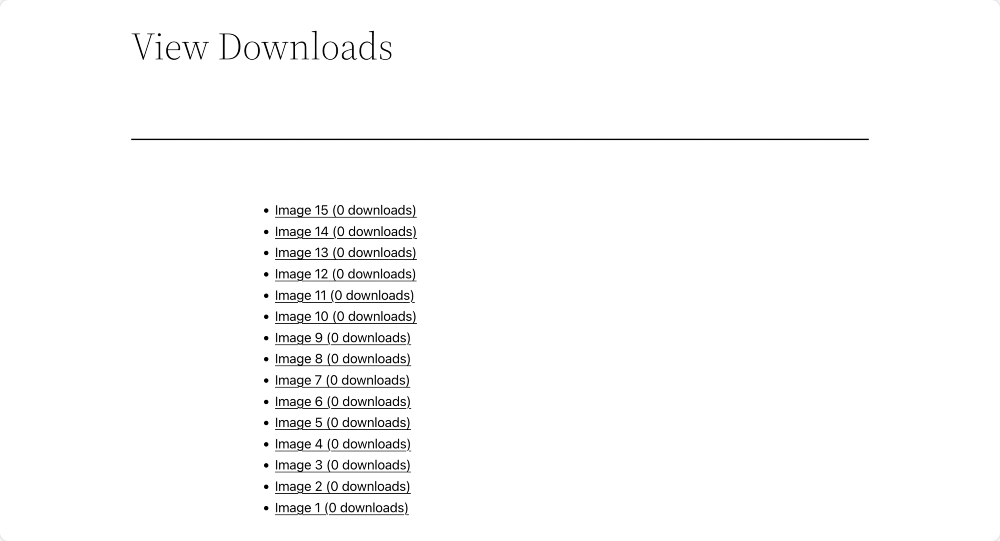
As you can see in the above screenshot, all our fifteen files are displayed on a single page, which appears cluttered and needs more appeal.
We can divide these multiple files into sections by adding a pagination shortcode.
So open the page, add the Shortcode block, and paste this shortcode
👉 [downloads paginate=true category=images per_page=5]

Change the category with the one you have (in our case, images is the category) and set the value per page to the one you need.
And this is how our multiple downloads with pagination look on the live page:
Final Thoughts
And there you’ve it! Using Download Monitor paginating digital downloads in WordPress is as easy as a b c….
Download Monitor is FREE forever, so you can leverage its features without spending a penny.
If you’d like to take things up a notch with more advanced features and extend the functionality of Download Monitor, you can try out its premium packages.
Get started with Download Monitor today! We’re positive you’re going to love it!
Download Monitor
Grow your audience, track download performance, and convert your traffic into email subscribers with an easy-to-use digital downloads solution for WordPress.